 (Aside: Apparently HTML parsers use the longest first line from one of these table entries to establish the right margin for all, so I need to make
sure that at least one has a nice long line of text at the top - enough to span a reasonably wide window... mission accomplished.)
(Aside: Apparently HTML parsers use the longest first line from one of these table entries to establish the right margin for all, so I need to make
sure that at least one has a nice long line of text at the top - enough to span a reasonably wide window... mission accomplished.)
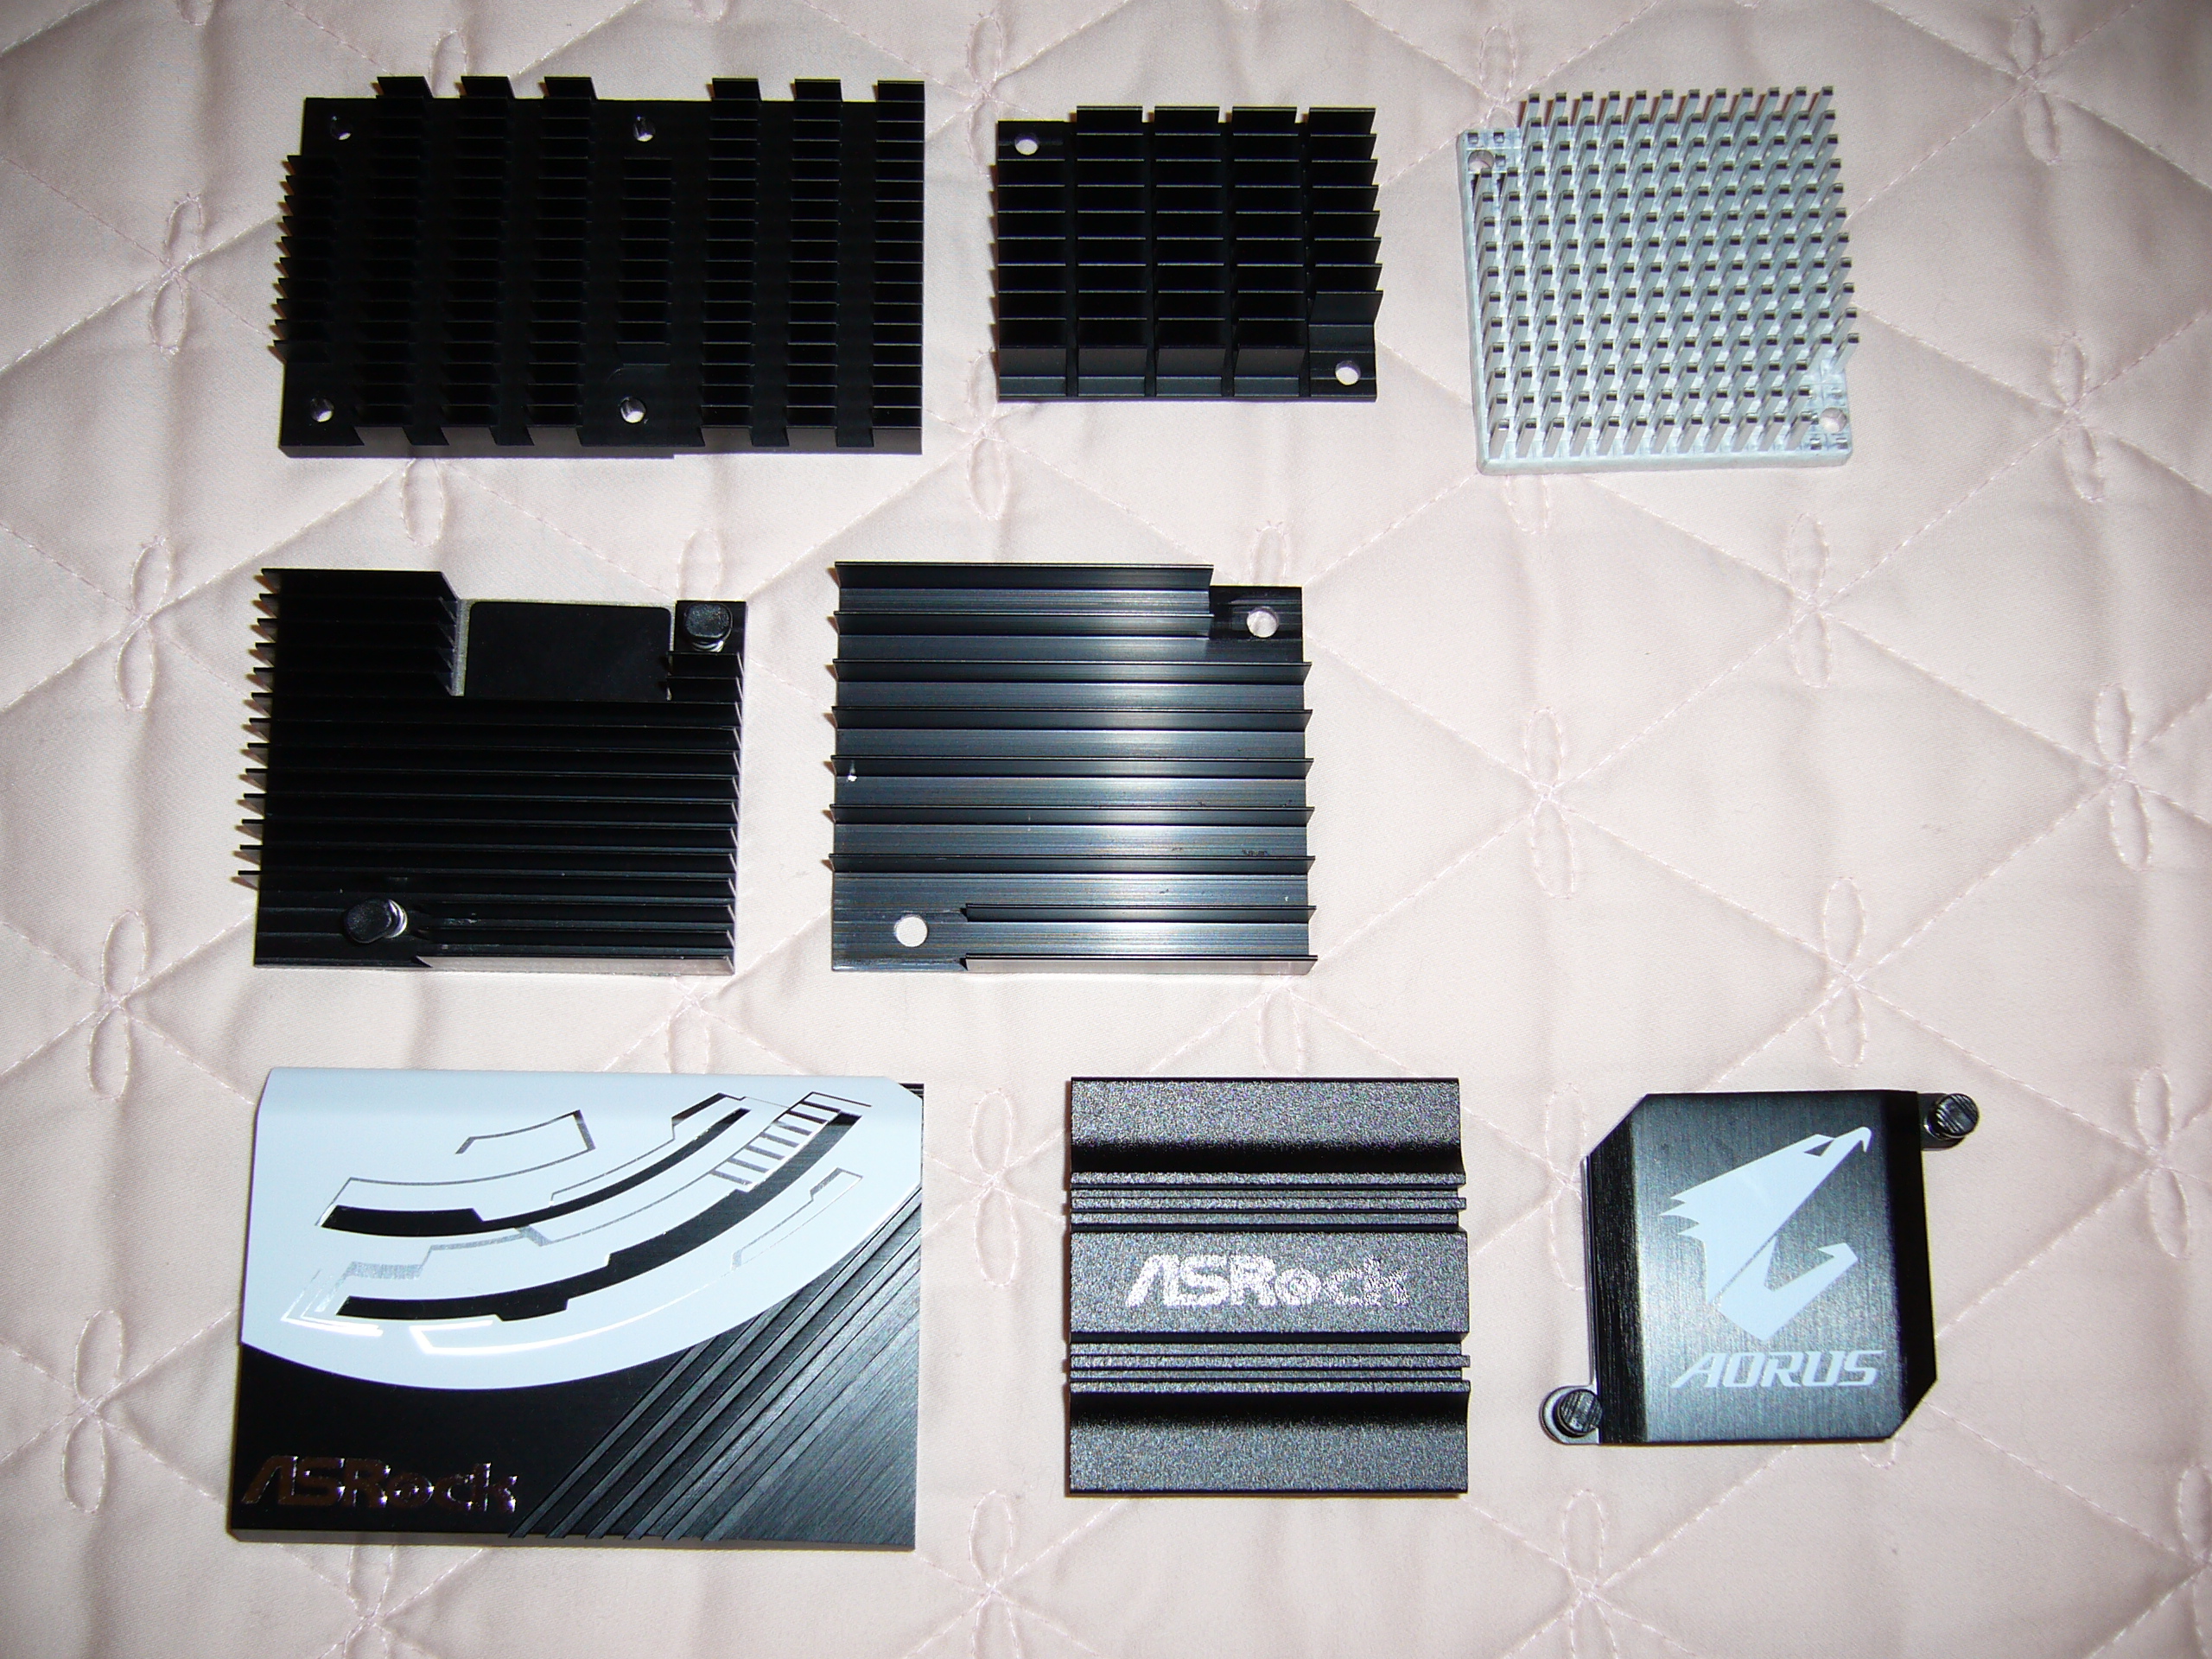
A few factory heat sinks (removed from random boards over the years and replaced with larger/better):
First row:  Chelsio T6 (10-22W), Aquantia AQC-107 (4-7W), Adaptec 8000 (12-15W)
Second row: Intel X710-DA (3.5-4W), Intel X550 (4-12W)
Third row:  A few chipset heat sinks: AMD X370, AMD B650, AMD B550 (all nominally 6W)
Listed wattage ranges reflect model and configuration variations.
I have a cheesy rule-of-thumb: Take the volume of a heat sink in mm3 and divide by power in W:
2500: OK for high air flow, might not catch fire with low/no air flow;
5000: OK for most applications, marginal for low/no air flow;
7500: Should be fine even for passive applications.
Obviously this does not work so well for the chipset heat sinks, which are largely just thermal mass (sometimes quite a bit of mass). But take, for instance:
The X710-DA: ~7000mm3/W - not bad, not that it's stopped me from replacing it;
the Chelsio T62100: ~1900mm3/W - not good.
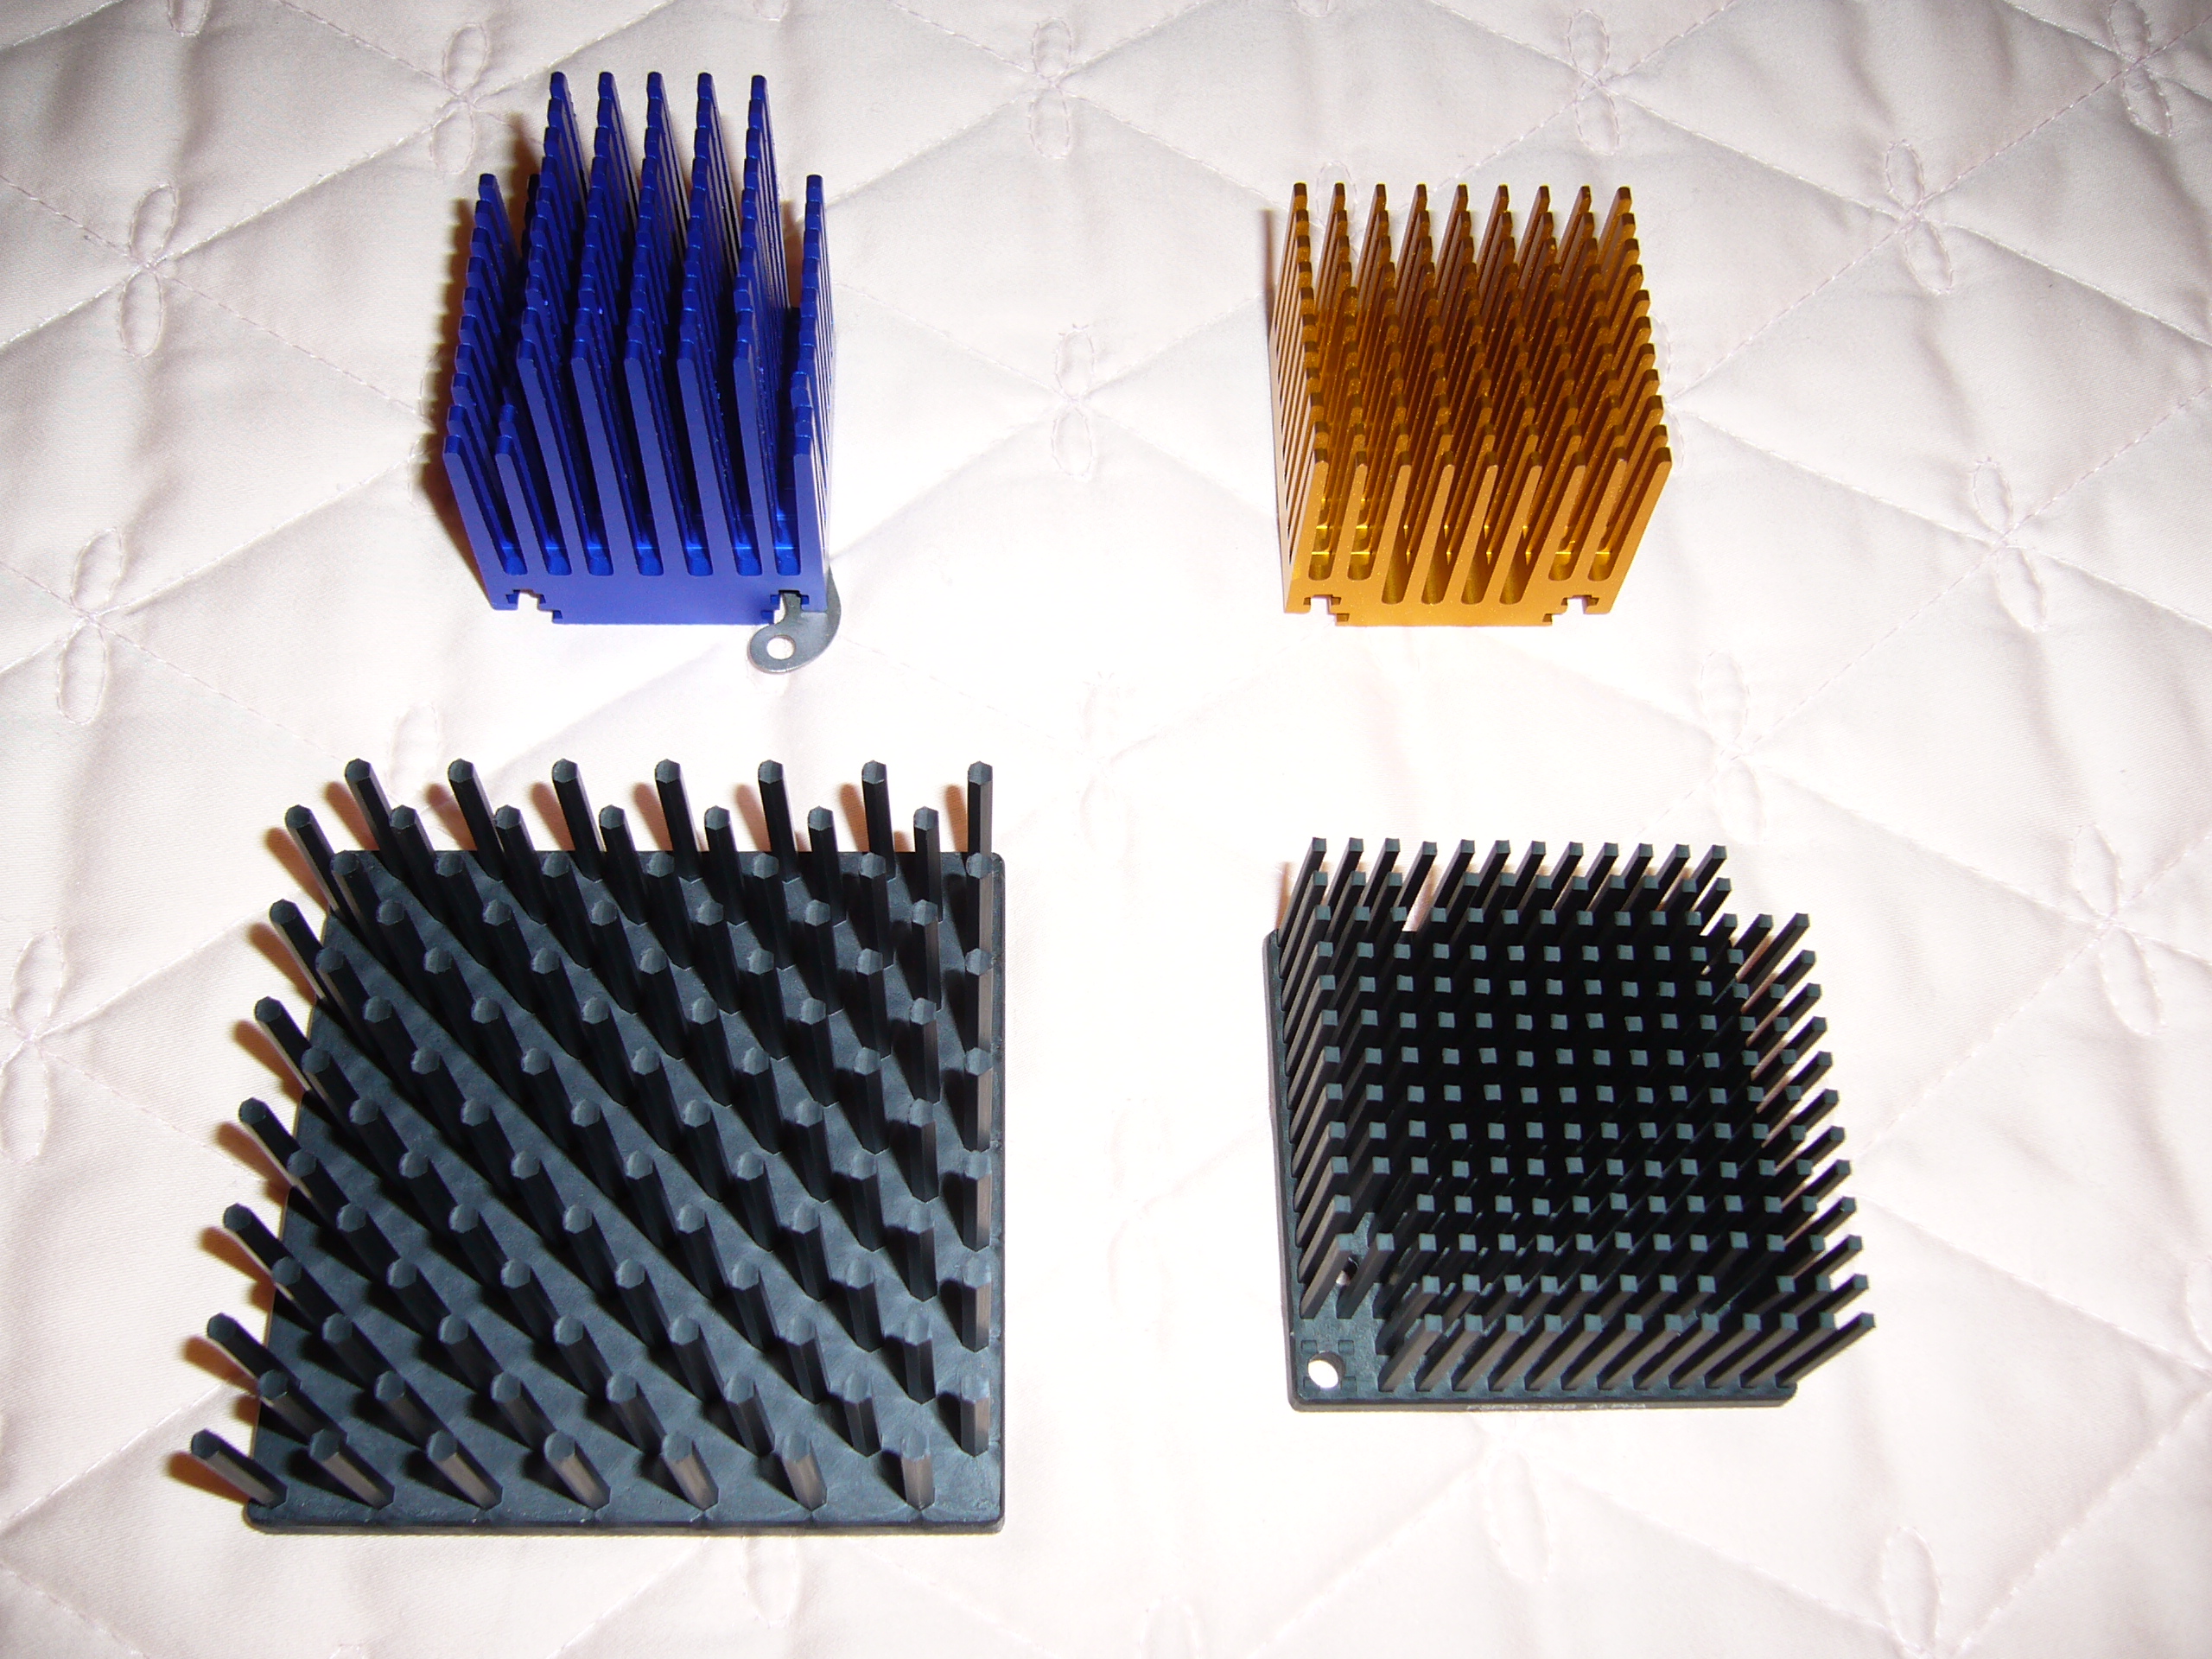 Some of the replacement heat sinks I use. The top ones are Zalmans, out of production for years now - I'm down to those two. The bottom ones are
Alpha Novatechs - they have lots of unusual shapes/sizes/mounting options,
and sell direct in small quantities.
Some of the replacement heat sinks I use. The top ones are Zalmans, out of production for years now - I'm down to those two. The bottom ones are
Alpha Novatechs - they have lots of unusual shapes/sizes/mounting options,
and sell direct in small quantities.
Note that the Adaptec heat sink above appears to be an Alpha, without the fancy finish.
Obviously I'm willing to compromise size/fit in favor of effectiveness. It's possible to have both, but requires much more effort (e.g. custom heat pipe setups).
I didn't photograph any M.2 heat sinks; a 40x20x25mm heat sink on an 8W M.2 device has ~2500mm3/W, which works OK with air flow. This assumes a good thermal interface, which can be tough to achieve due to space limitations and differing component heights in particular. A 65x22x25mm heat sink - about as large as will fit on a 2280 device - would be better. Most M.2 heat sinks are junk.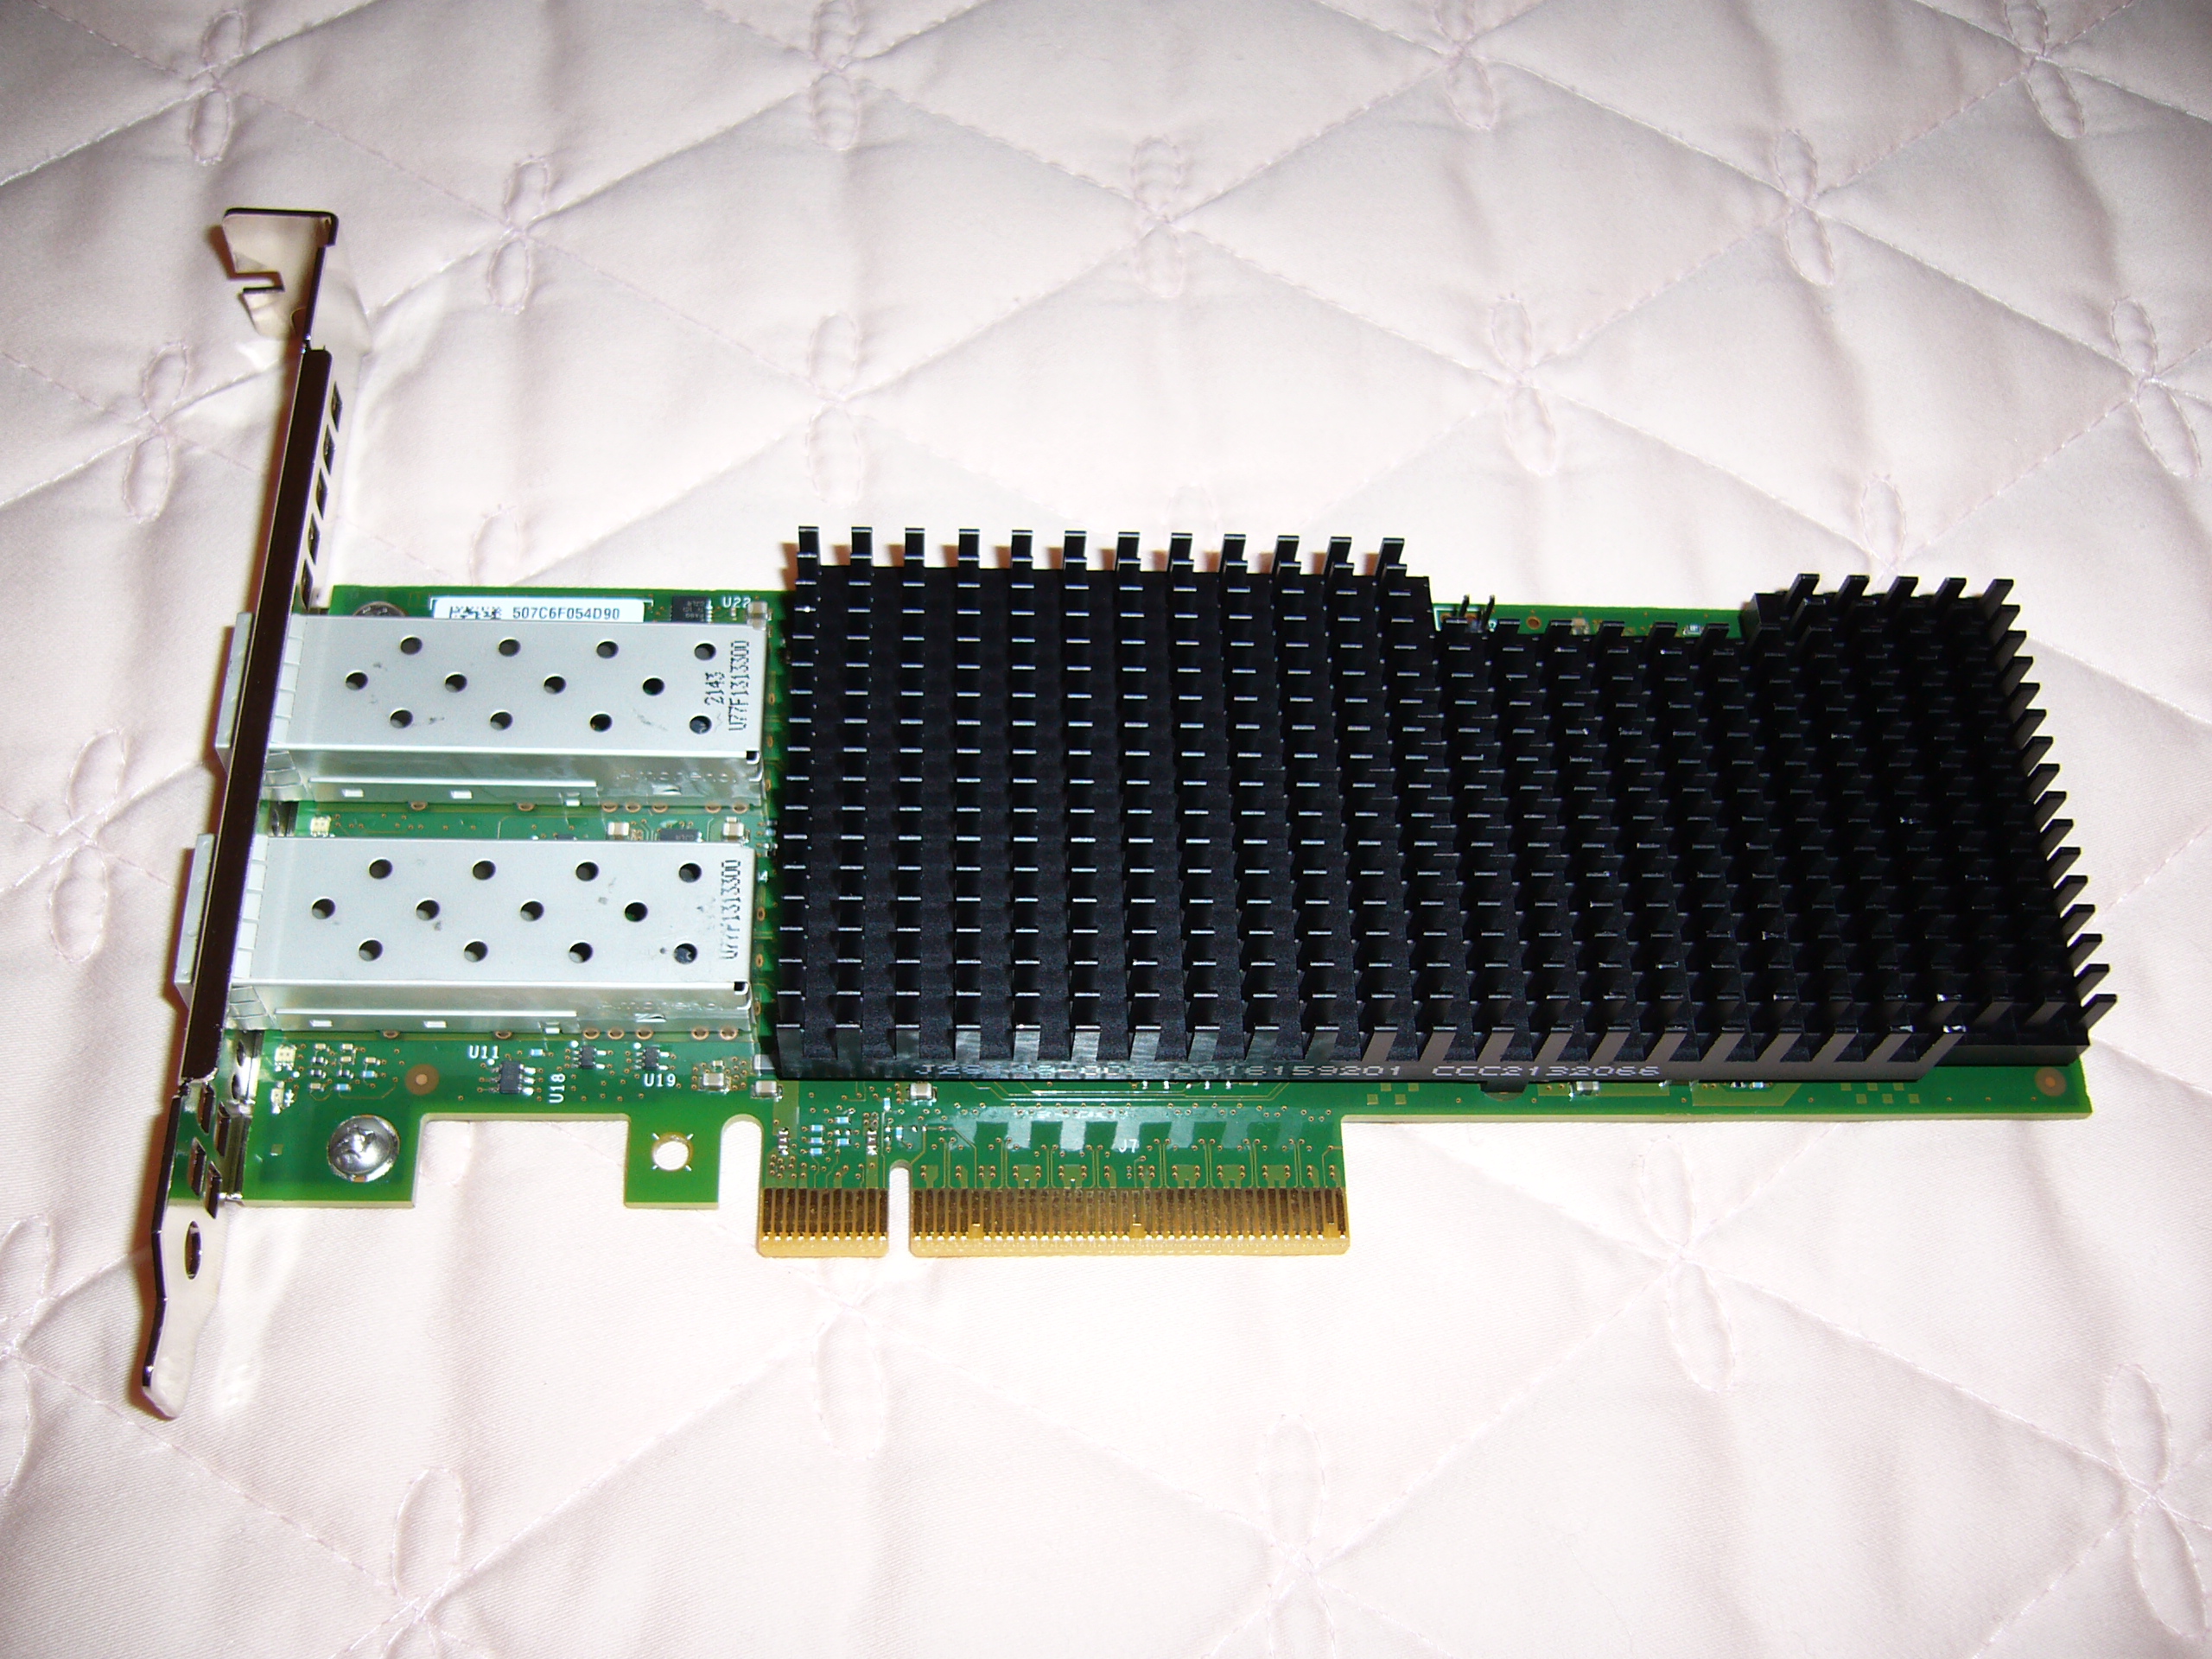 The XXV710 has about as nice a heat sink as will fit on a single-slot HHHL card, and at ~5000mm3/W, it could be worse. If I was designing
a card in the 10-12W range, this is what I'd go for. I suppose it'd be the best mainstream (single-slot) solution for higher-power cards as well,
unfortunately.
The XXV710 has about as nice a heat sink as will fit on a single-slot HHHL card, and at ~5000mm3/W, it could be worse. If I was designing
a card in the 10-12W range, this is what I'd go for. I suppose it'd be the best mainstream (single-slot) solution for higher-power cards as well,
unfortunately.
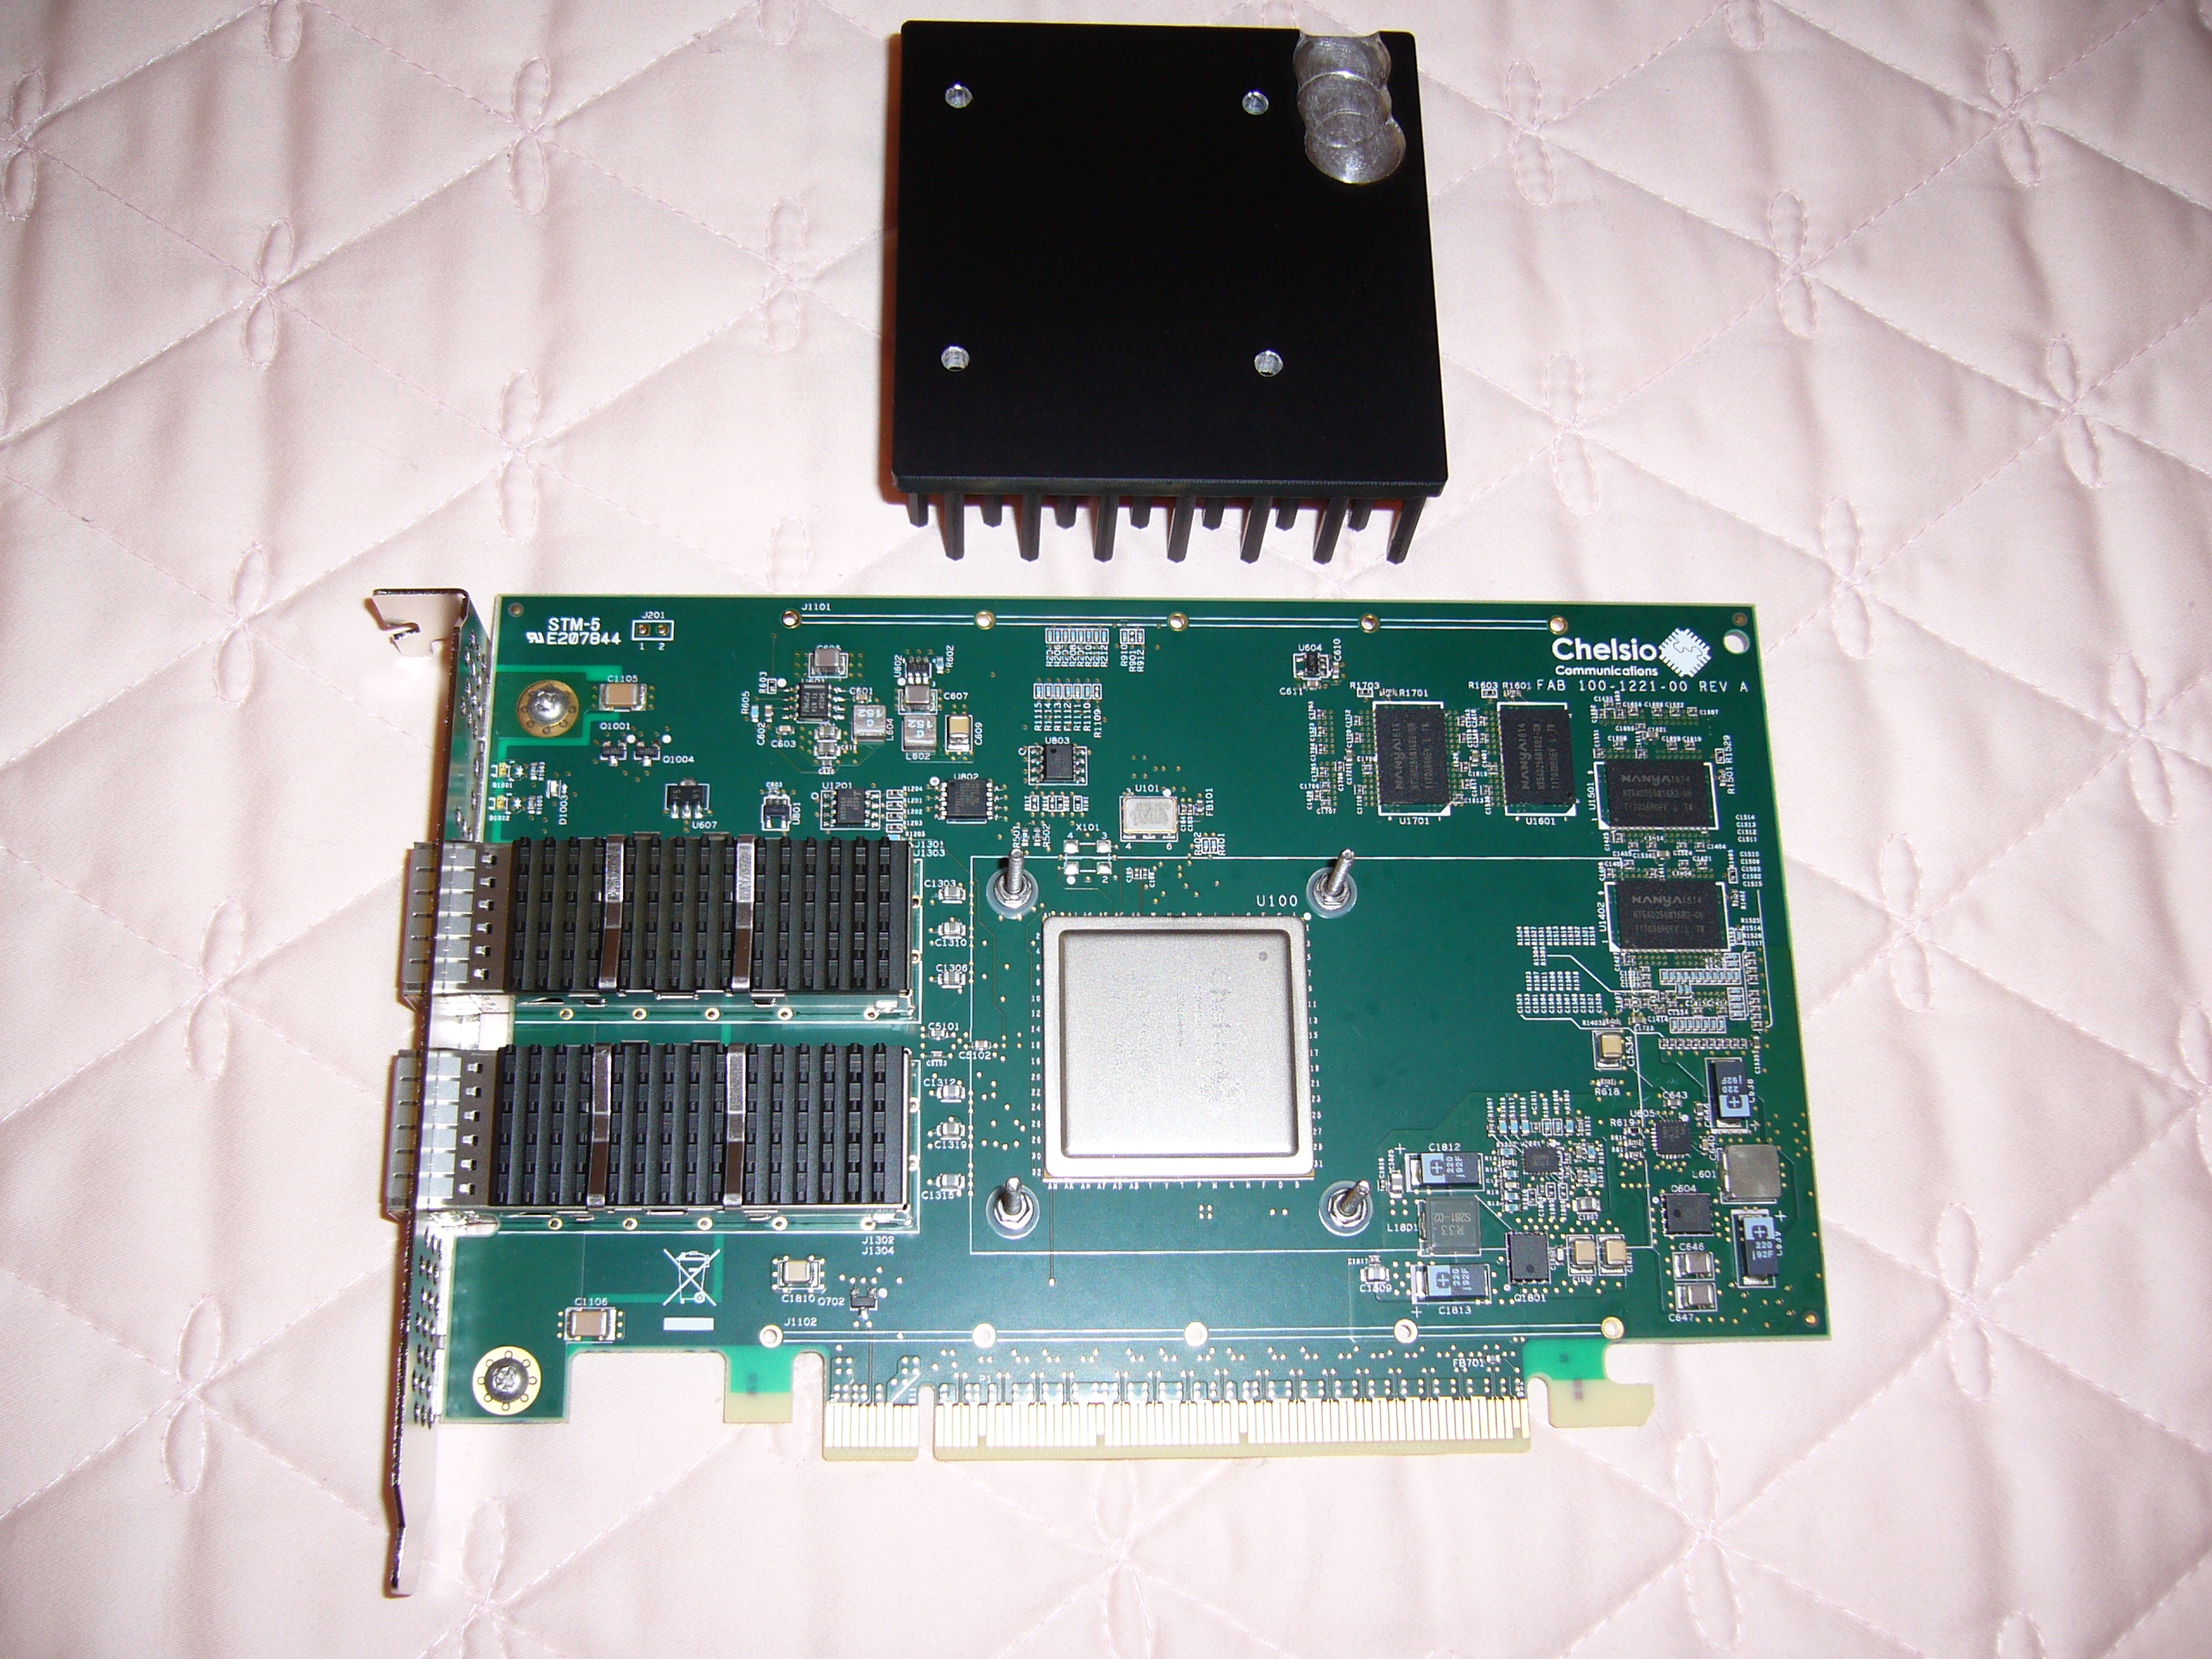
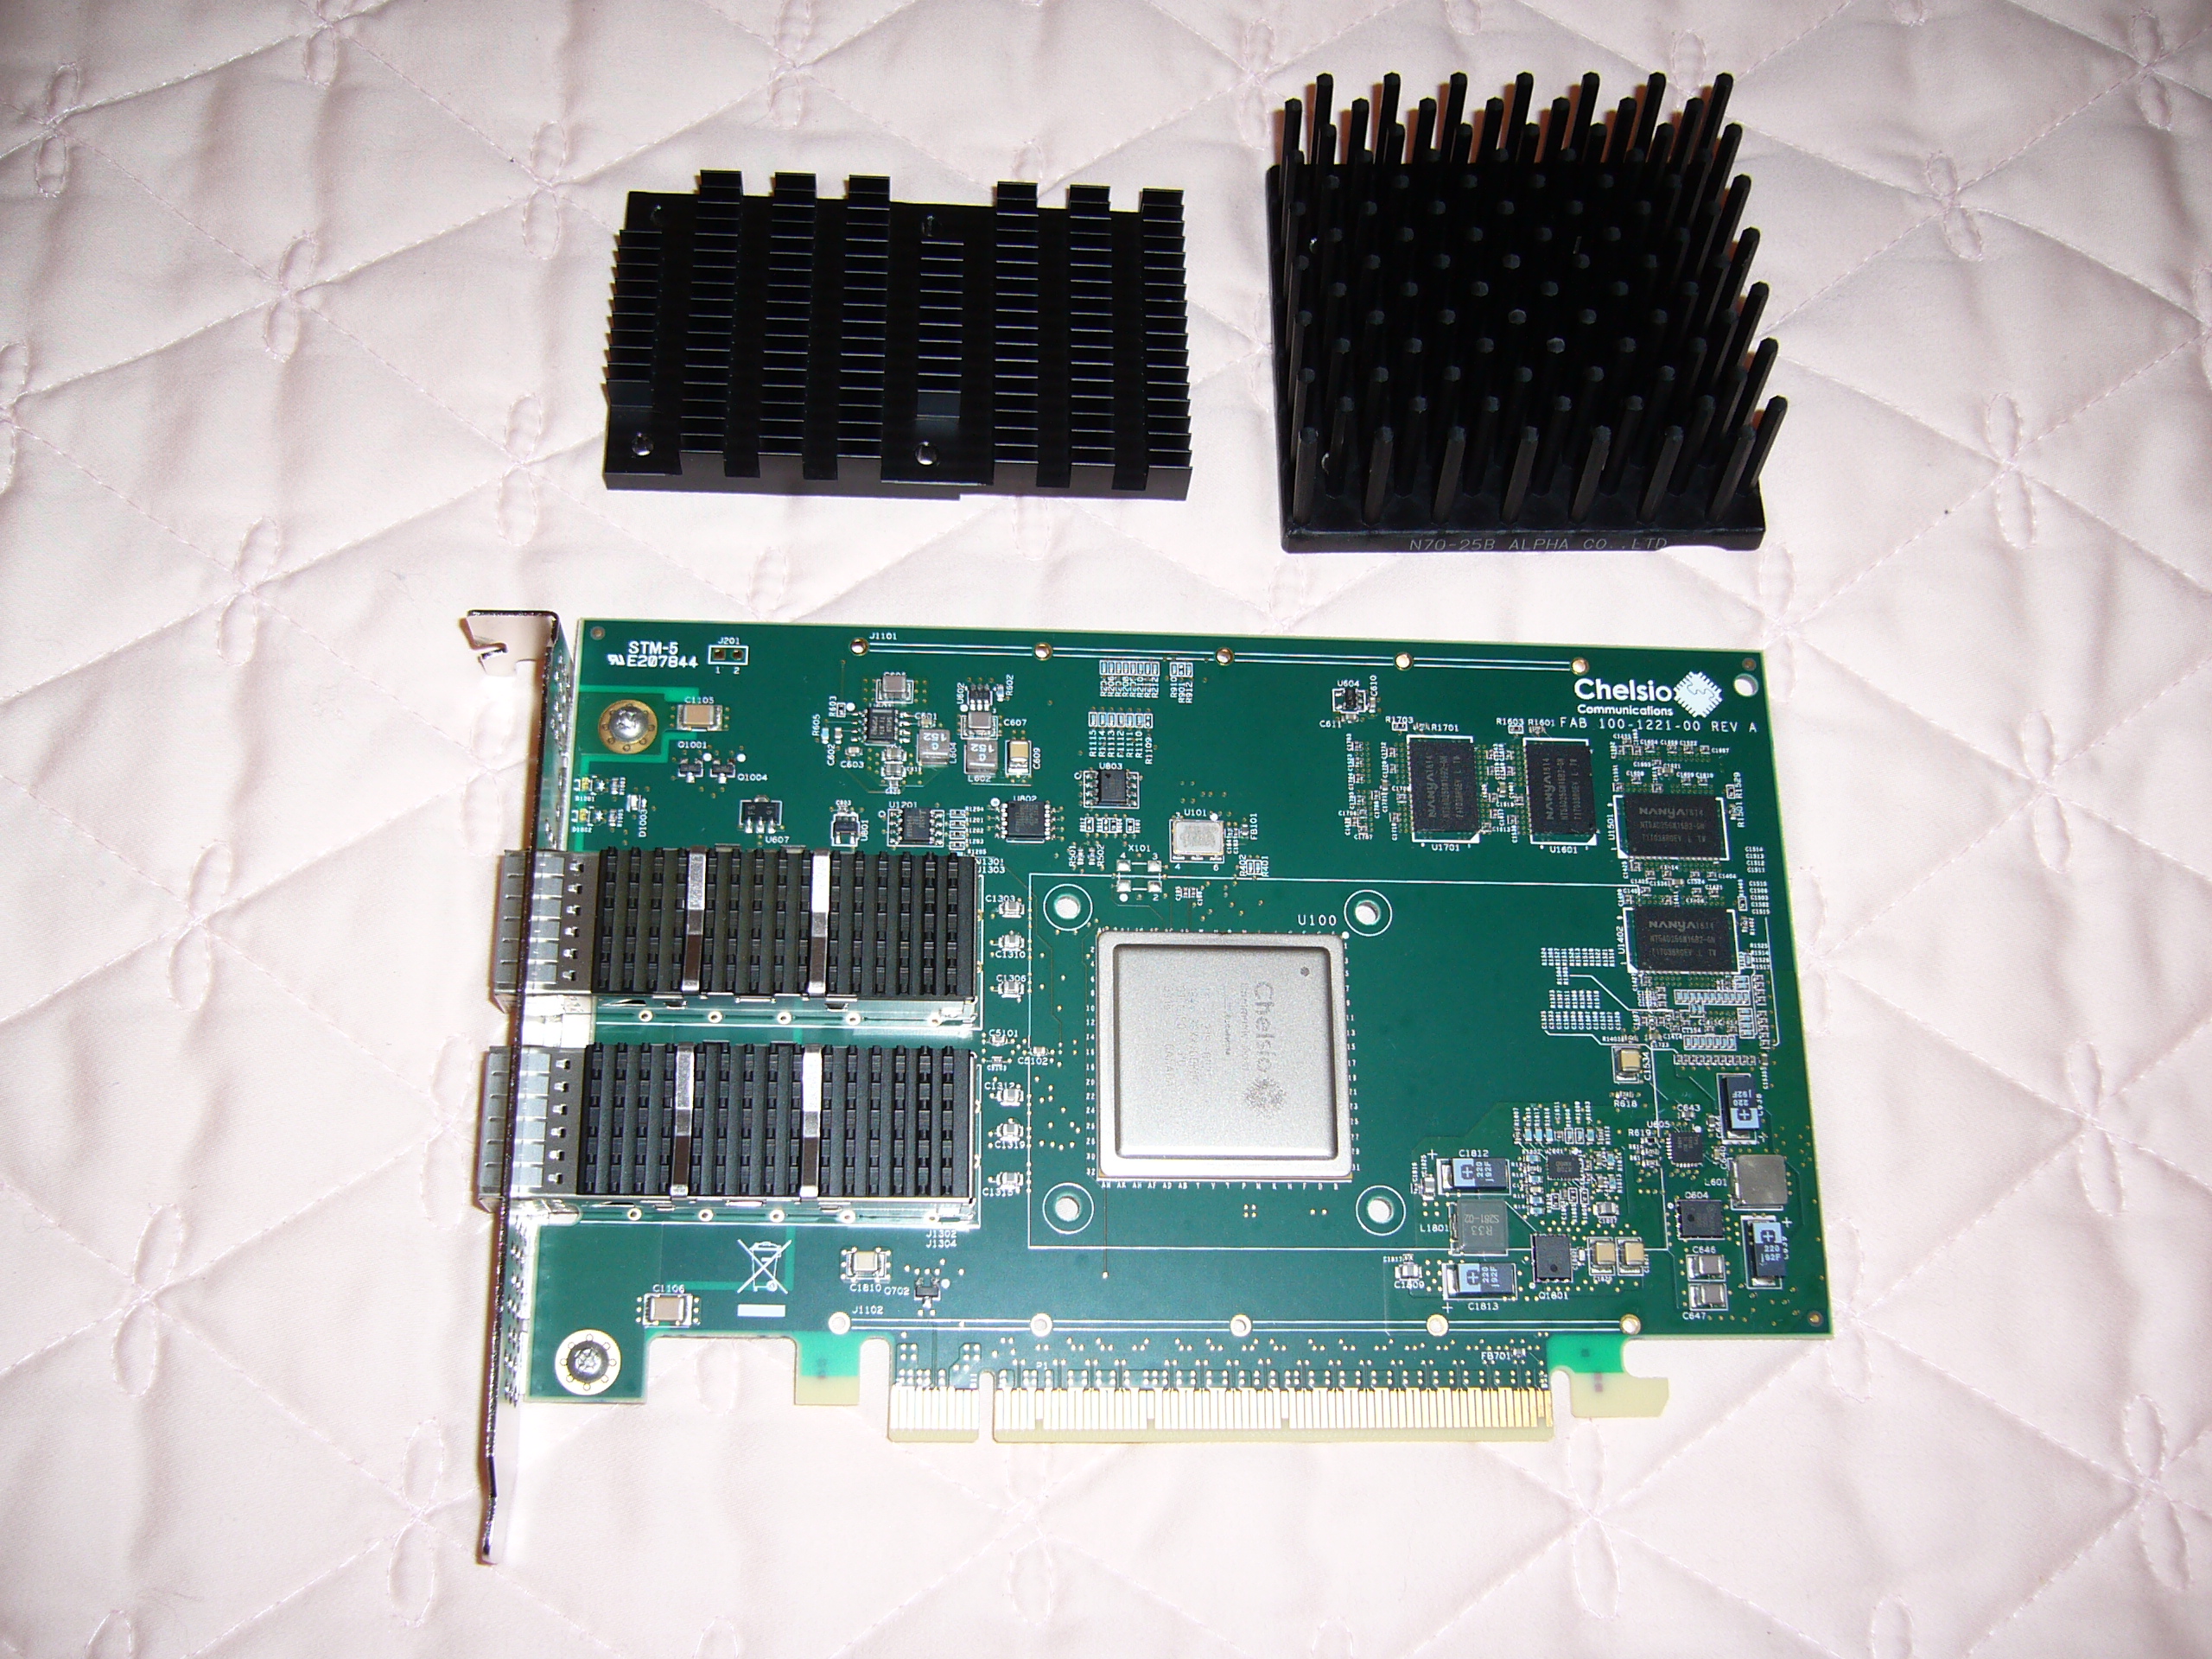 Here's the Chelsio T62100 with old and new heat sinks. I chose the Alpha pin type in this specific size because the pin spacing allowed me to locate
the mounting holes between pins (10mm C-C against a 40.5mm mount spacing).
Here's the Chelsio T62100 with old and new heat sinks. I chose the Alpha pin type in this specific size because the pin spacing allowed me to locate
the mounting holes between pins (10mm C-C against a 40.5mm mount spacing).
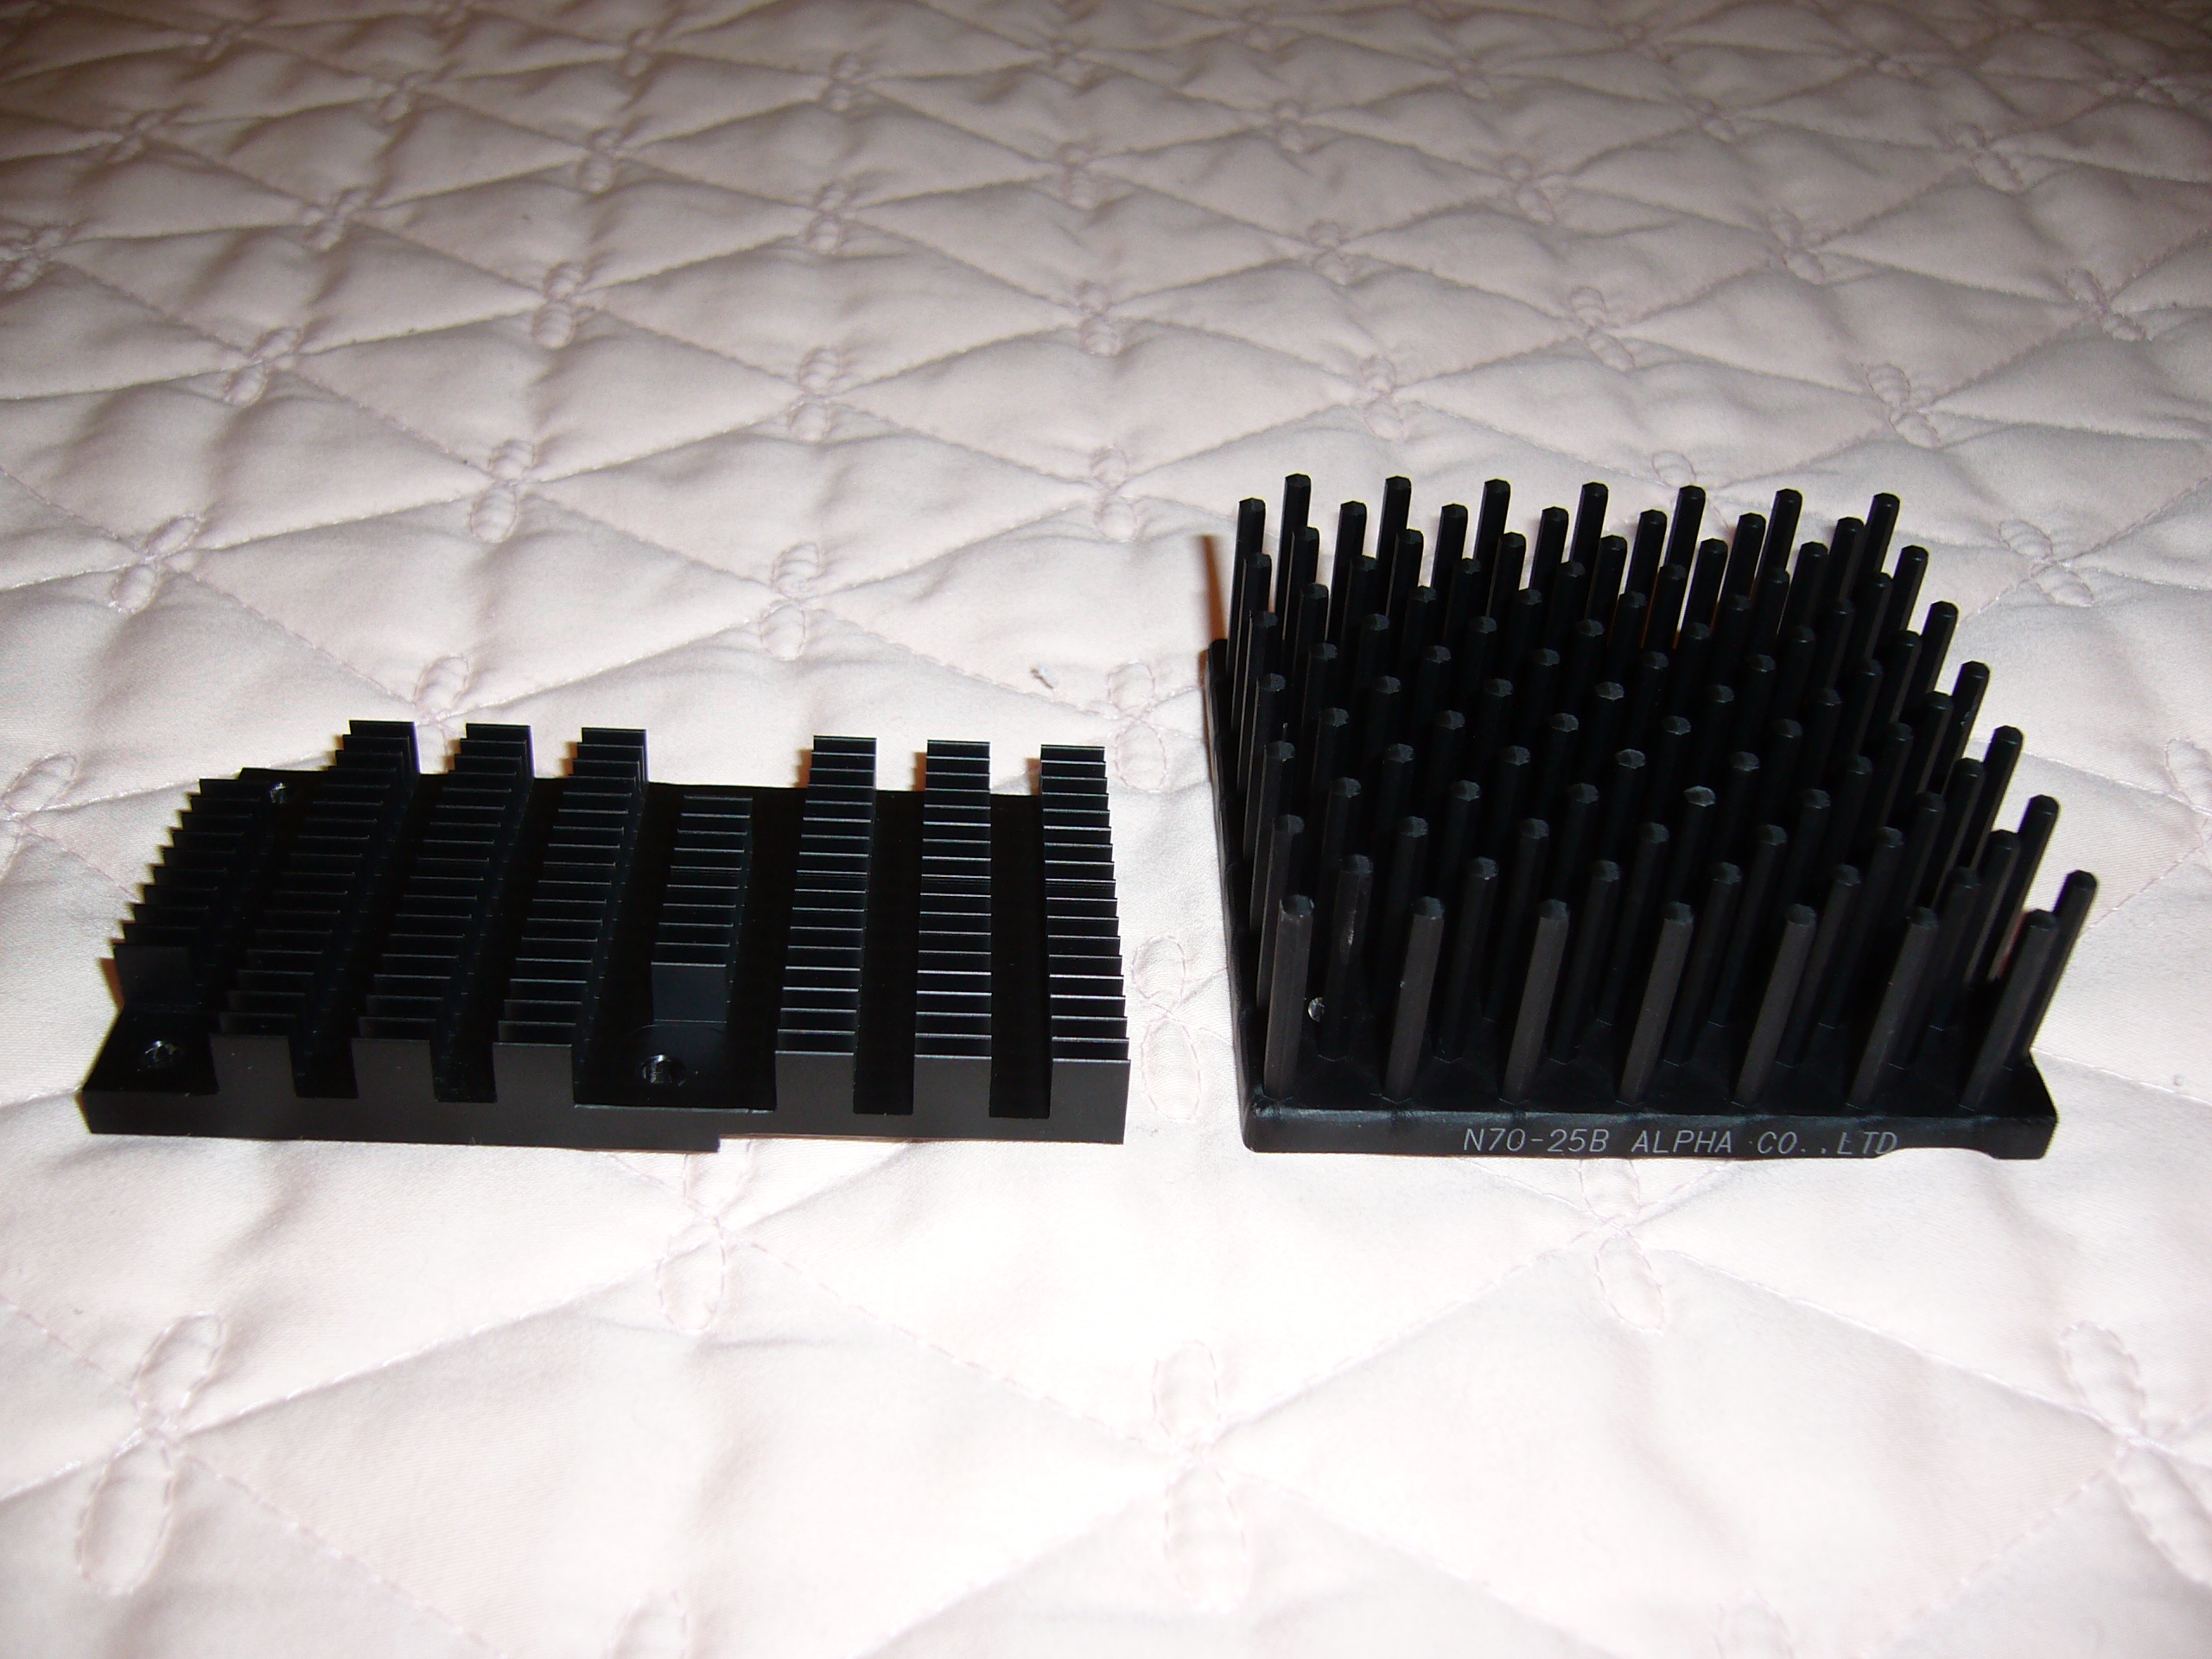 A slightly different perspective. The new heat sink has ~2.9x the volume of the old, but only ~1.5x the surface area, so its 5500mm3/W
might not be as much better than the original as the number would seem to indicate. Still, it should be considerably better under low/no air flow
conditions, as on a test bench. Don't run the factory card without air flow.
A slightly different perspective. The new heat sink has ~2.9x the volume of the old, but only ~1.5x the surface area, so its 5500mm3/W
might not be as much better than the original as the number would seem to indicate. Still, it should be considerably better under low/no air flow
conditions, as on a test bench. Don't run the factory card without air flow.
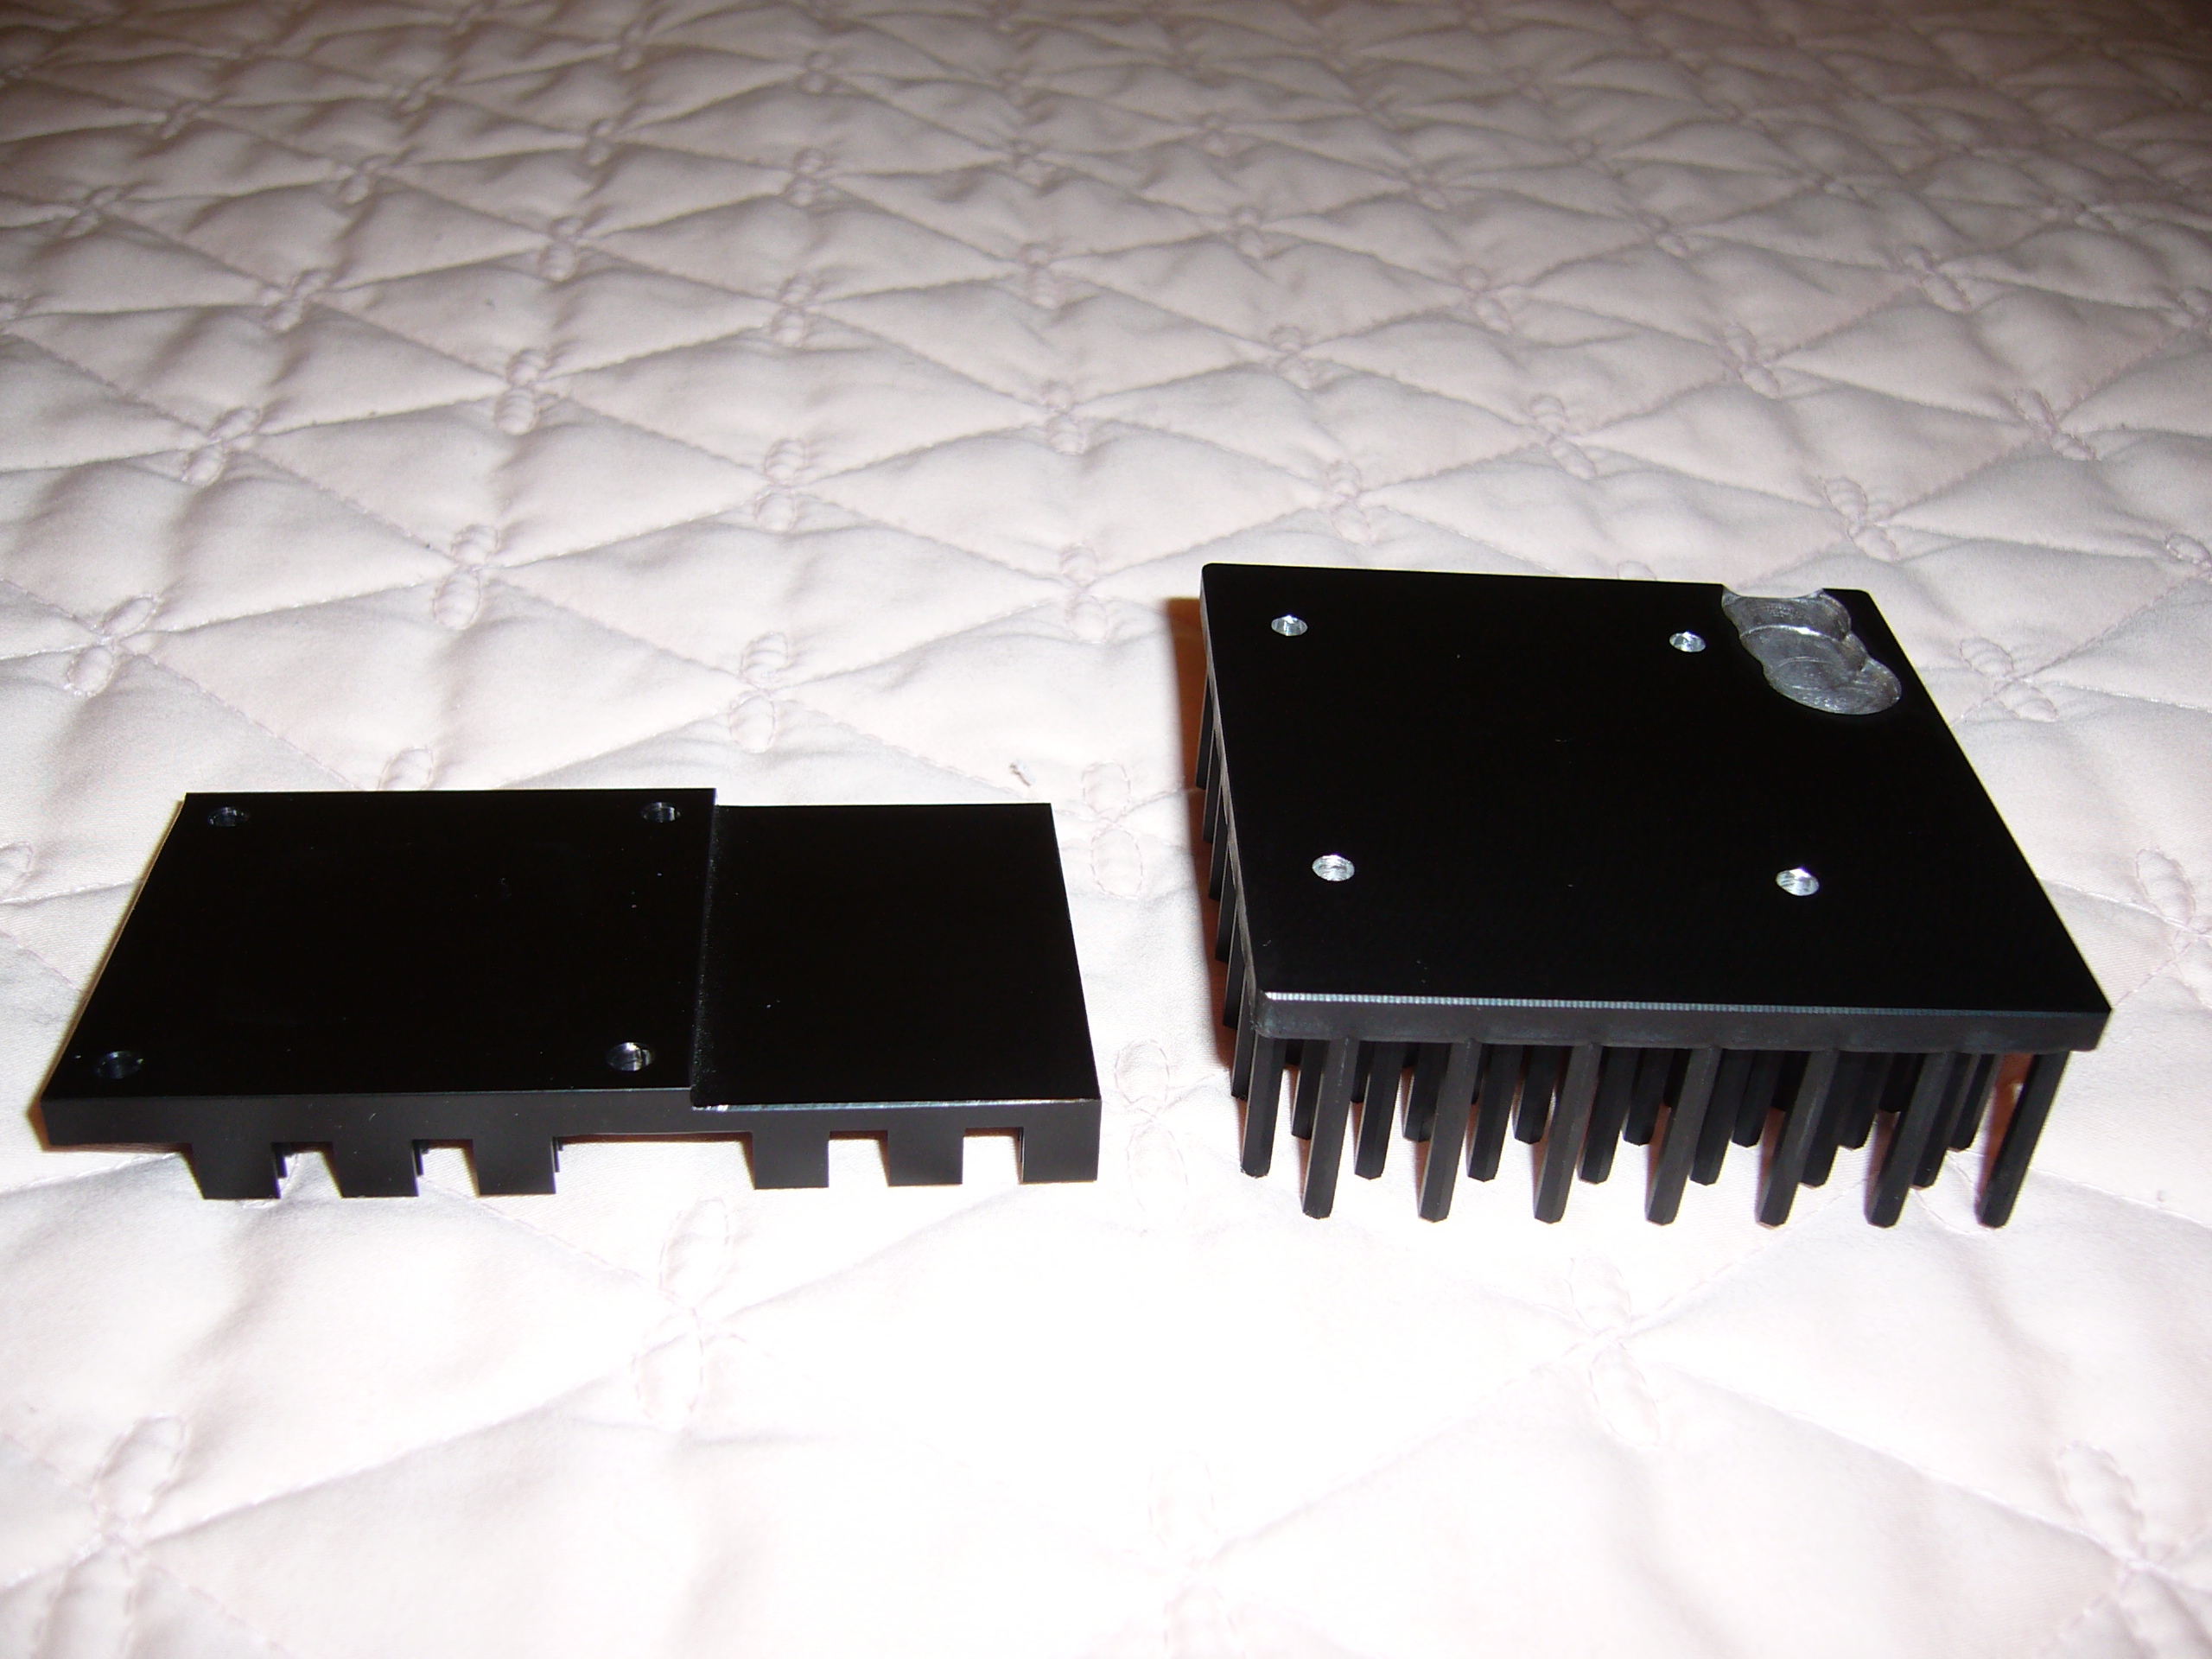 A bottom view, showing the step on the old heat sink and the crude divots I plunge milled into the new, to miss the large caps and inductor near the
T6. I used a cheap 15/16" end mill, which, under light pressure, managed to walk a 15lb vise that was clamped to the drill press bench. Oh well -
it'll work, and the ugly divots are not readily visible when it's installed.
A bottom view, showing the step on the old heat sink and the crude divots I plunge milled into the new, to miss the large caps and inductor near the
T6. I used a cheap 15/16" end mill, which, under light pressure, managed to walk a 15lb vise that was clamped to the drill press bench. Oh well -
it'll work, and the ugly divots are not readily visible when it's installed.
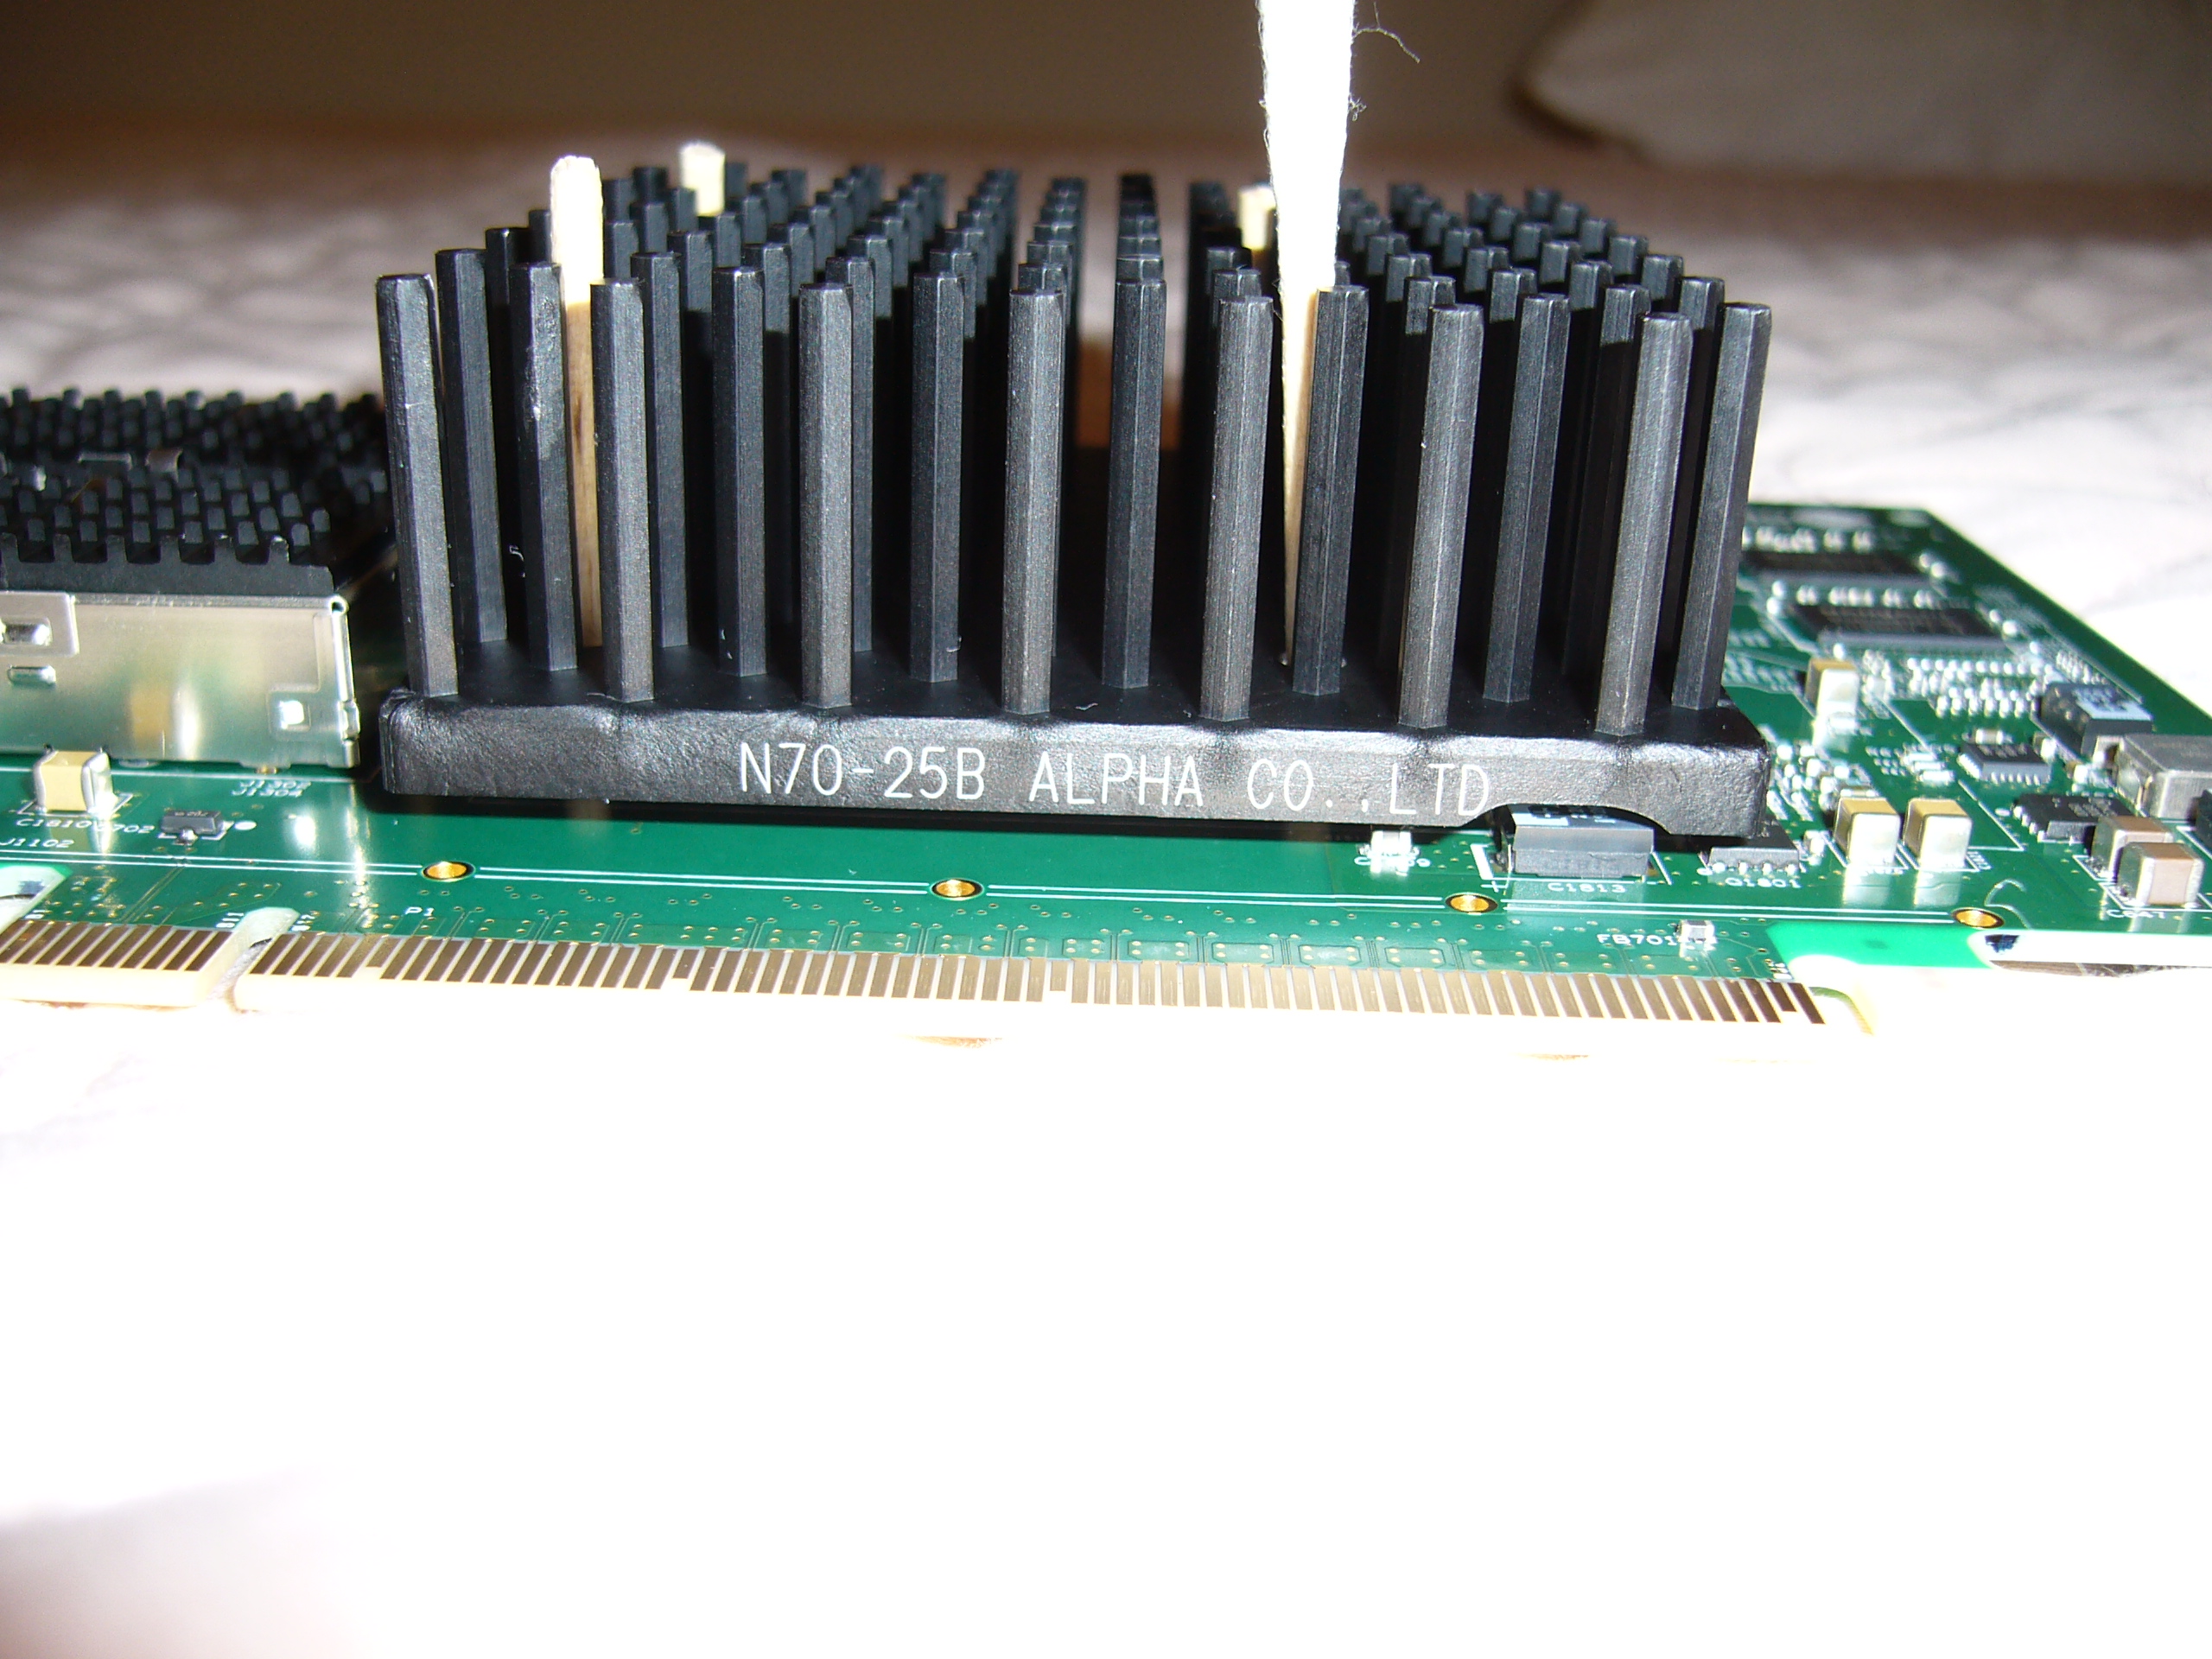 Mock-up view of the clearance divot. I enlarged the opening a bit after taking this photo. It looks closer than it is.
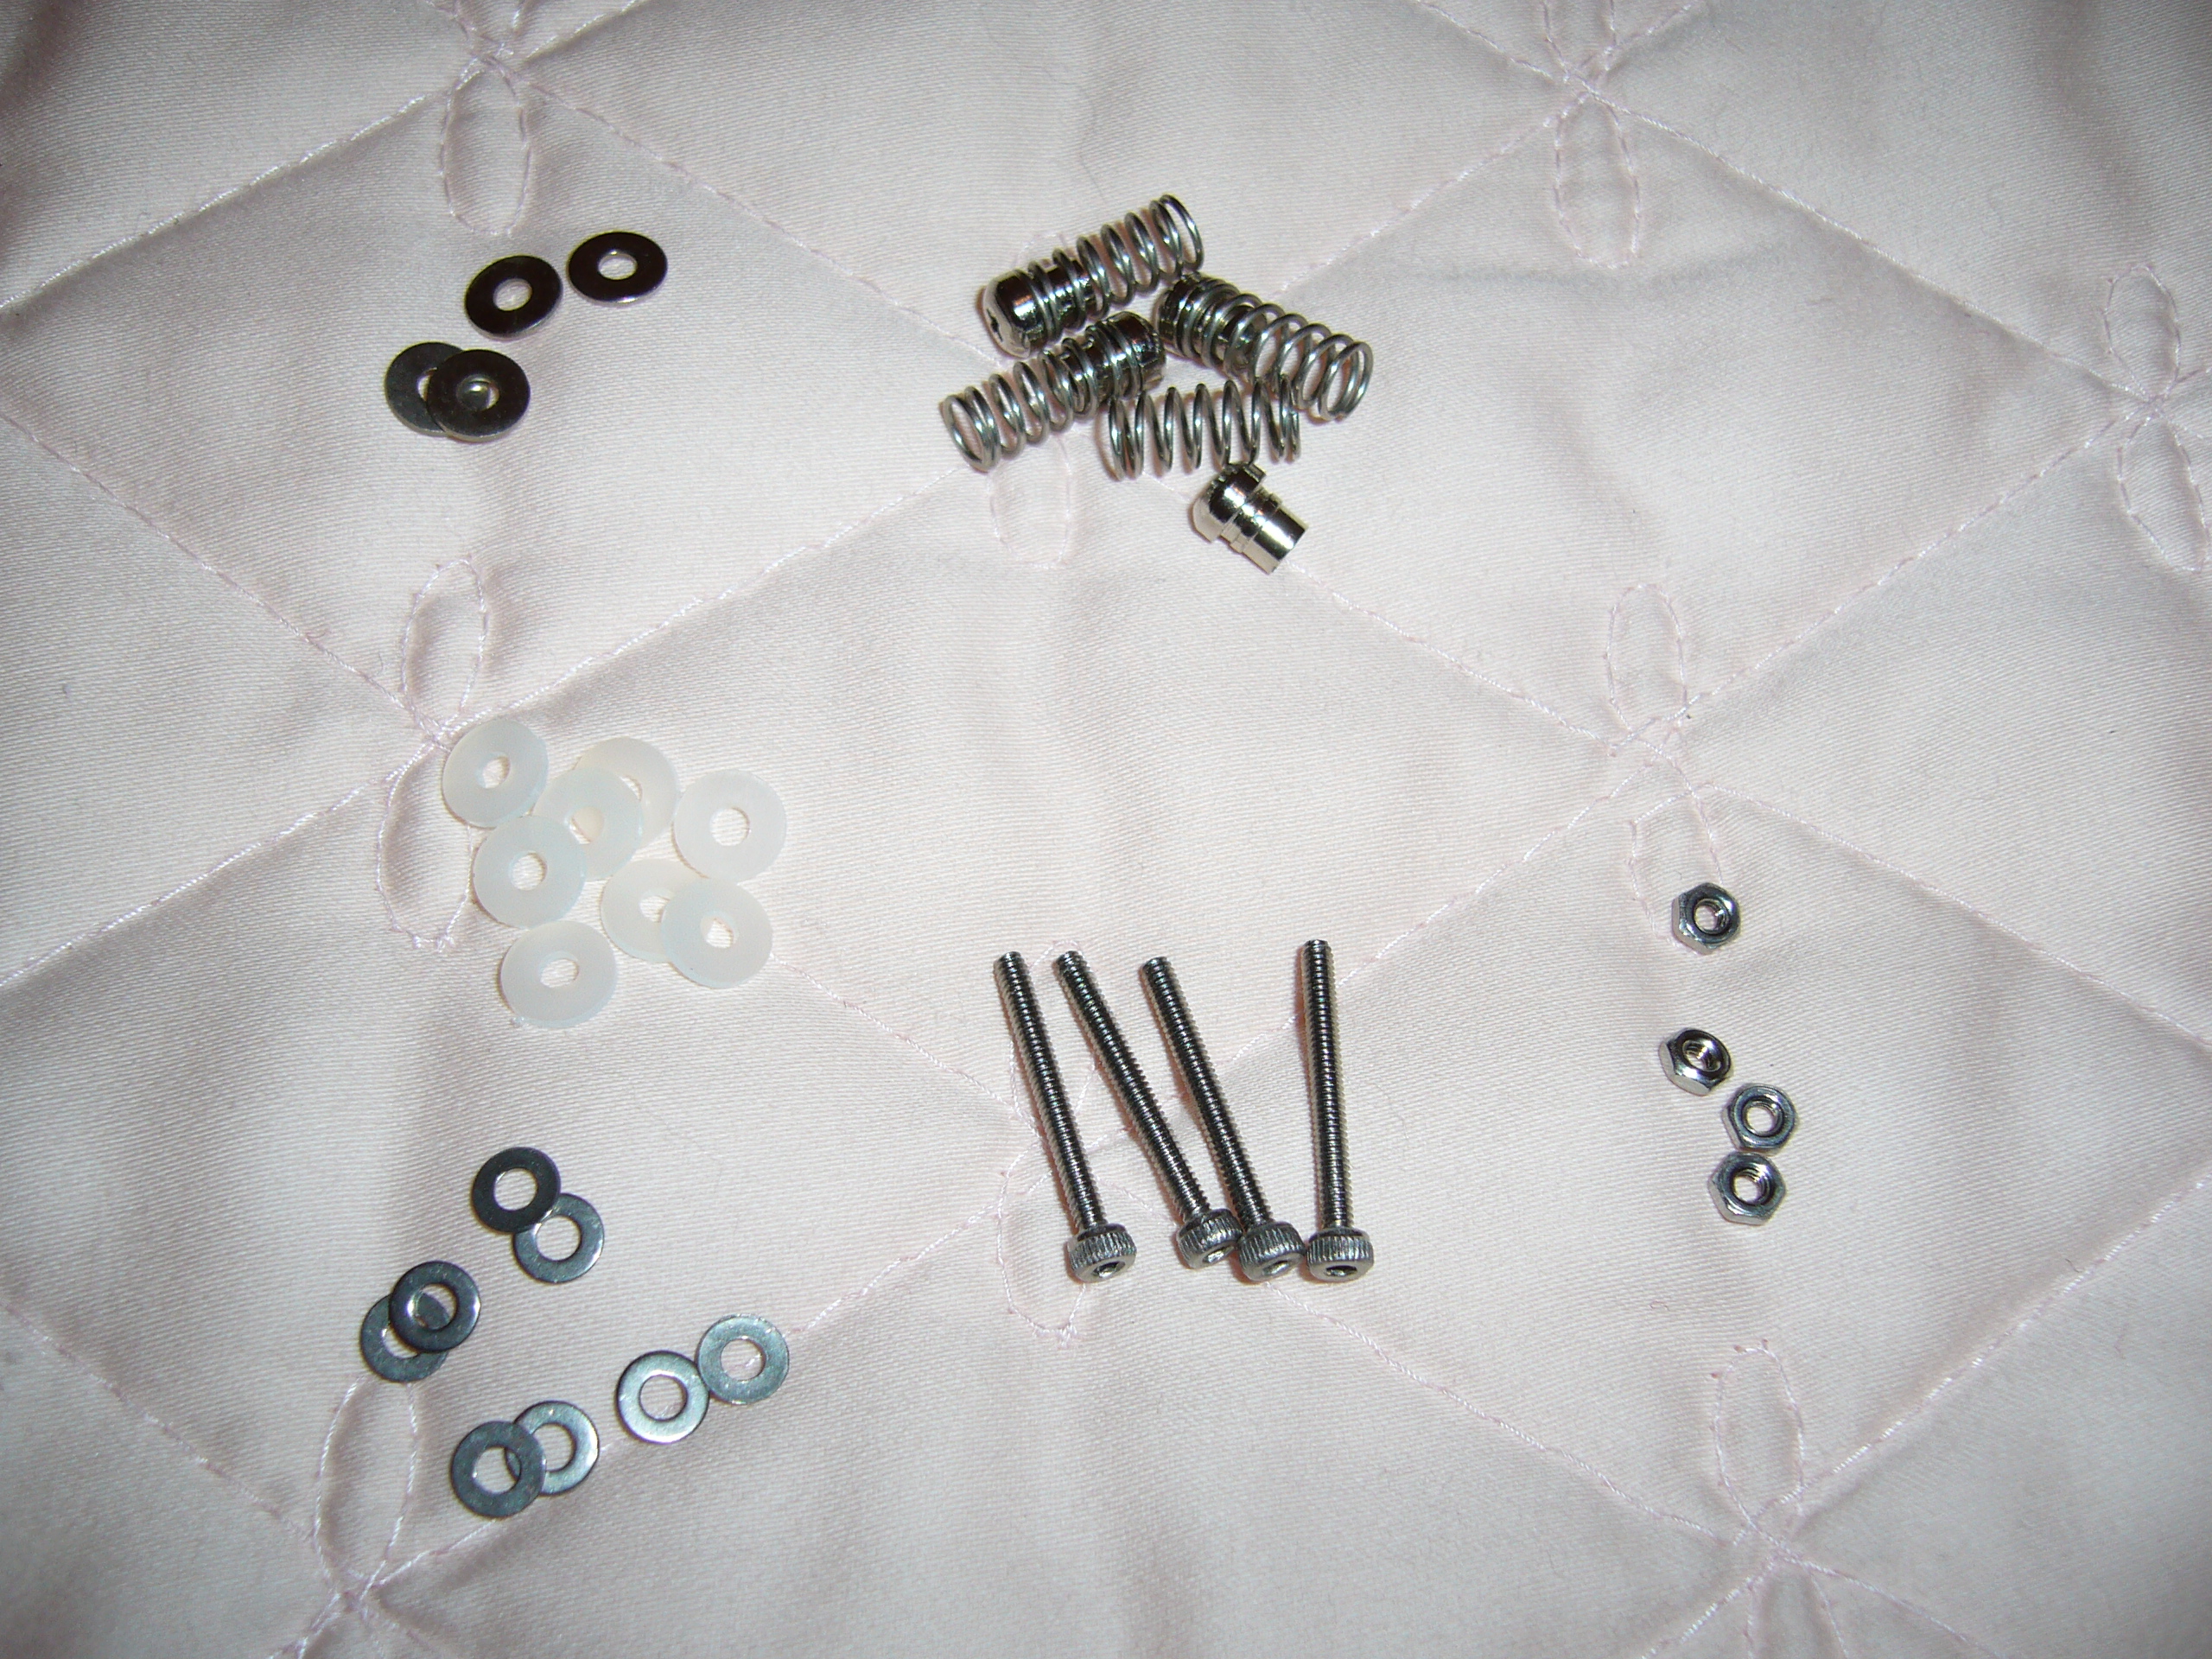 The hardware: four 18mm M2 screws, four springs, four standard nuts, four spring nuts, four #2 washers, eight M2 washers, and eight #2 nylon washers.
(The #2 washers are 6mm in diameter; the M2s are 5mm.) The springs and nuts came from my pile of random hardware - I don't recall their original
application.
The hardware: four 18mm M2 screws, four springs, four standard nuts, four spring nuts, four #2 washers, eight M2 washers, and eight #2 nylon washers.
(The #2 washers are 6mm in diameter; the M2s are 5mm.) The springs and nuts came from my pile of random hardware - I don't recall their original
application.
 Screws installed, ready to go. The T6 chip's height allows this type of installation.
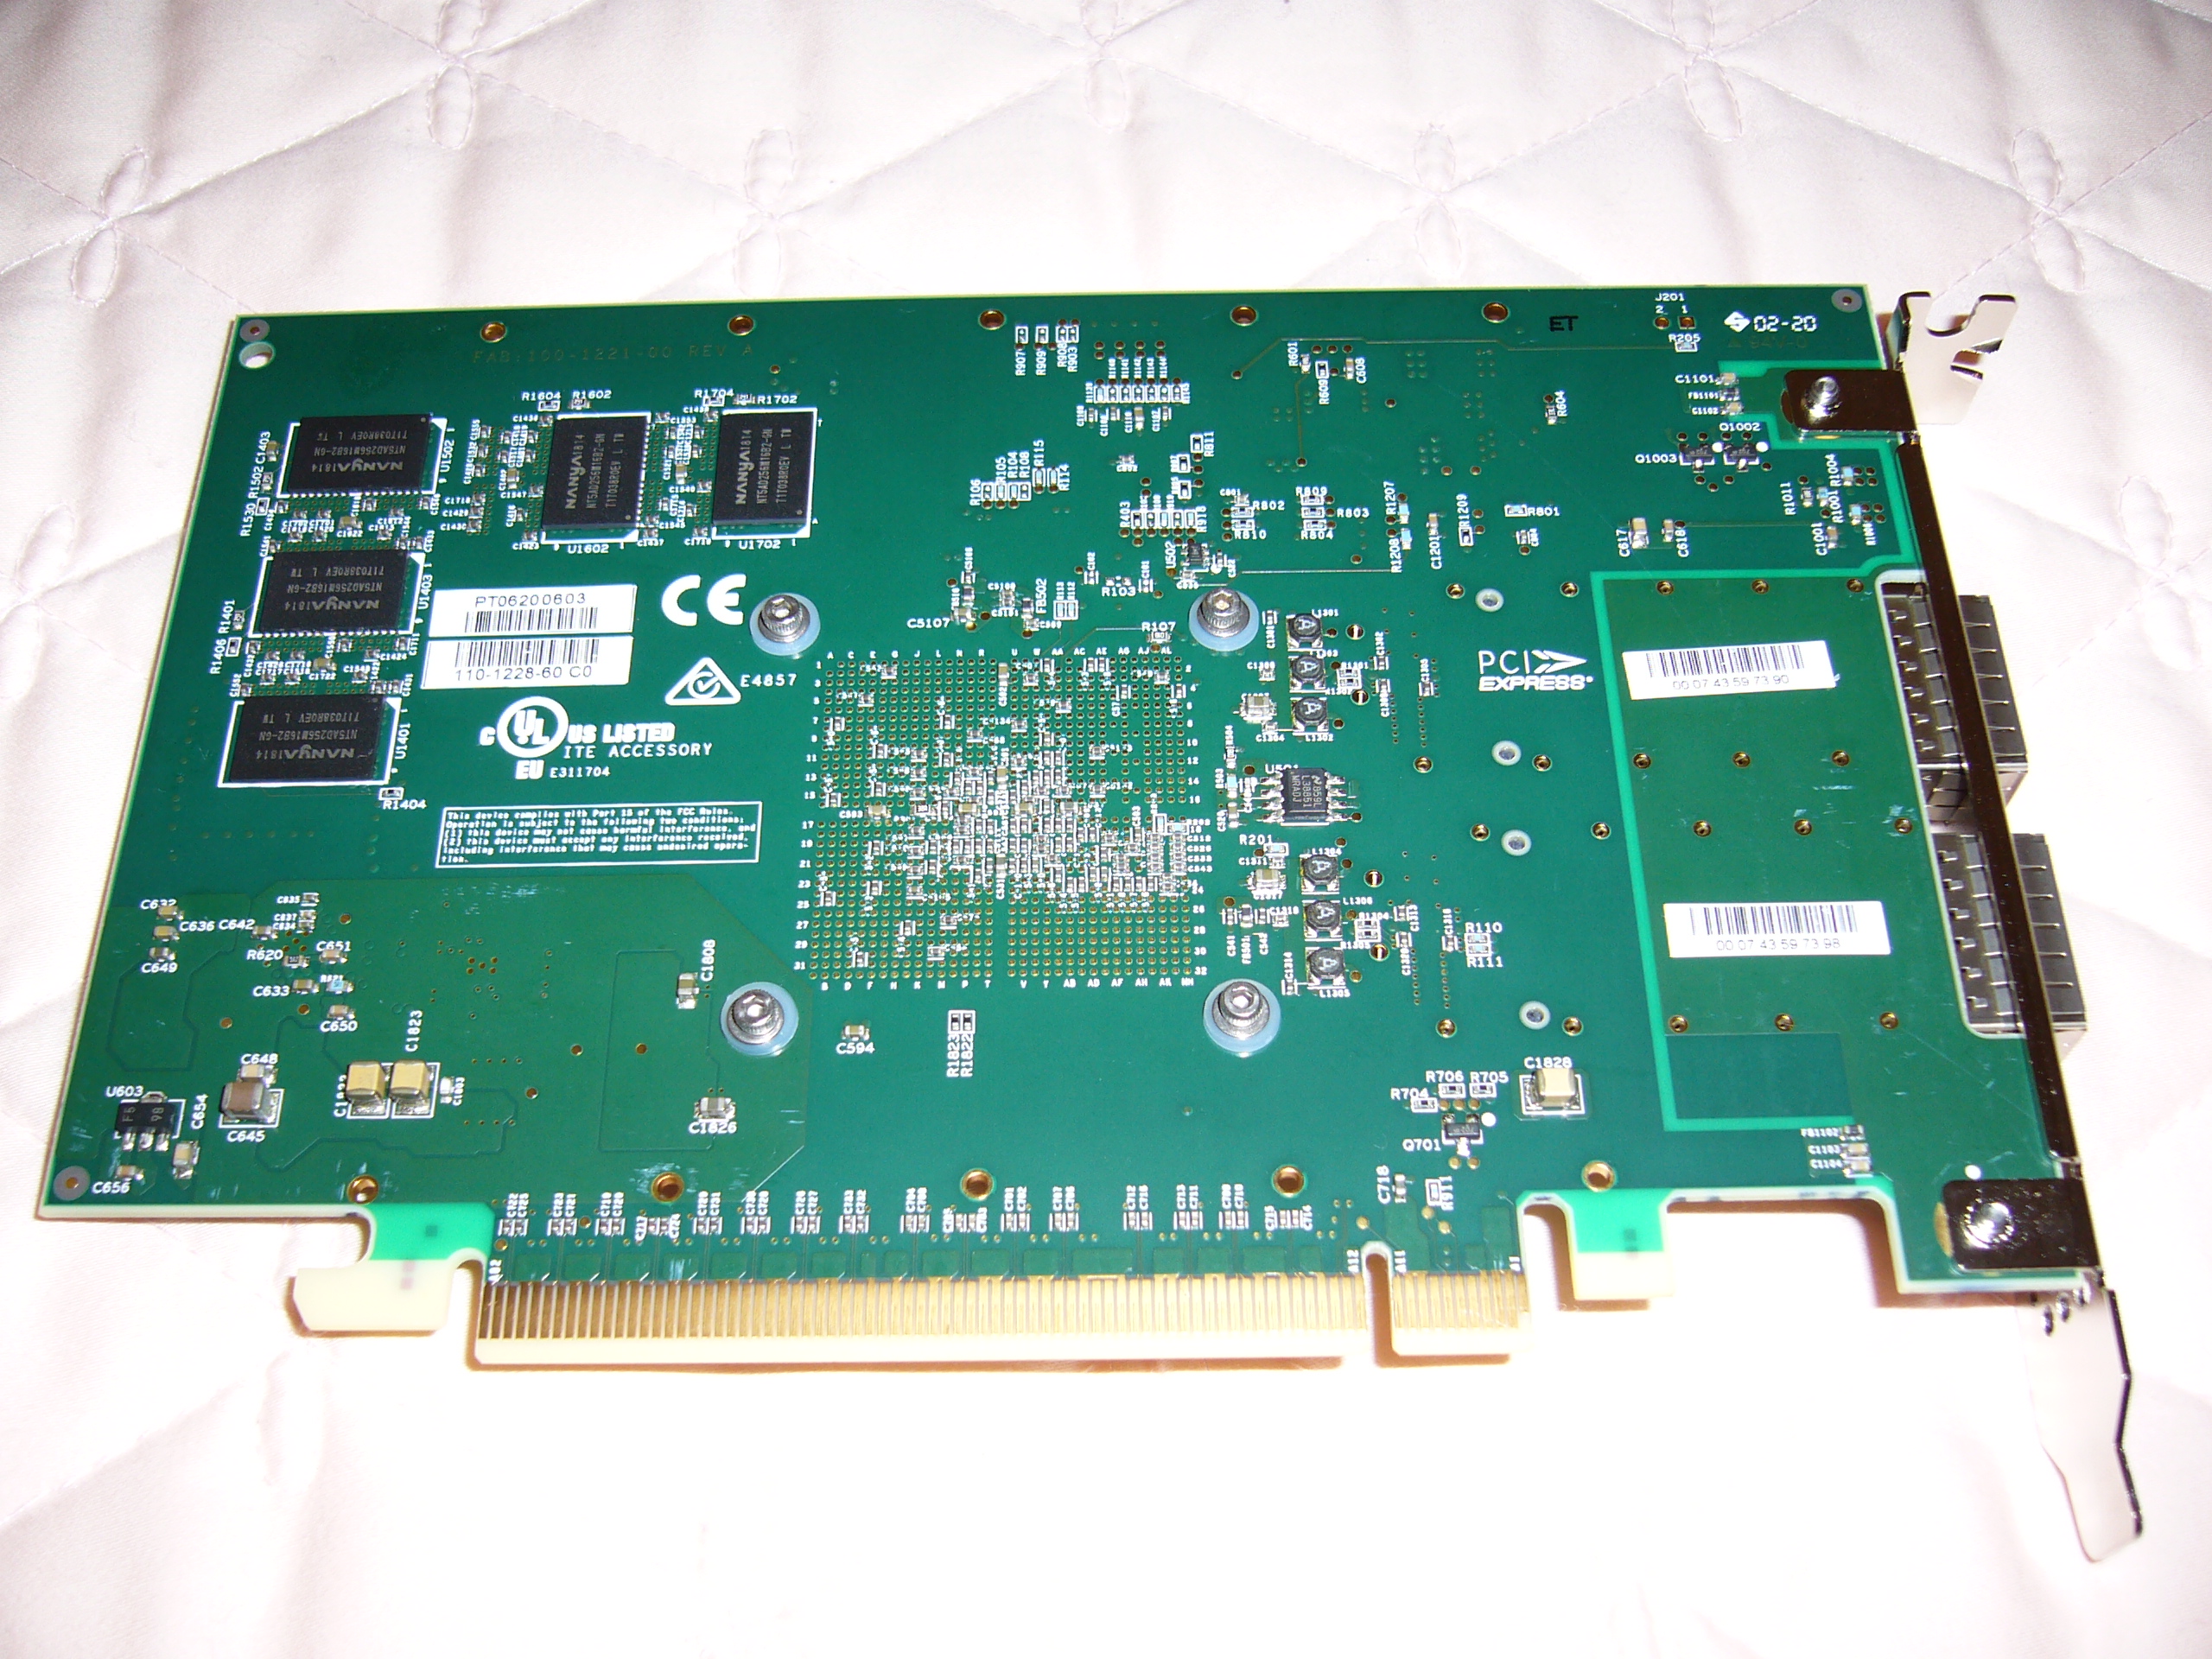 Back view. Yes, the card has 4GB of ECC RAM (which I'll only use to run the card firmware).
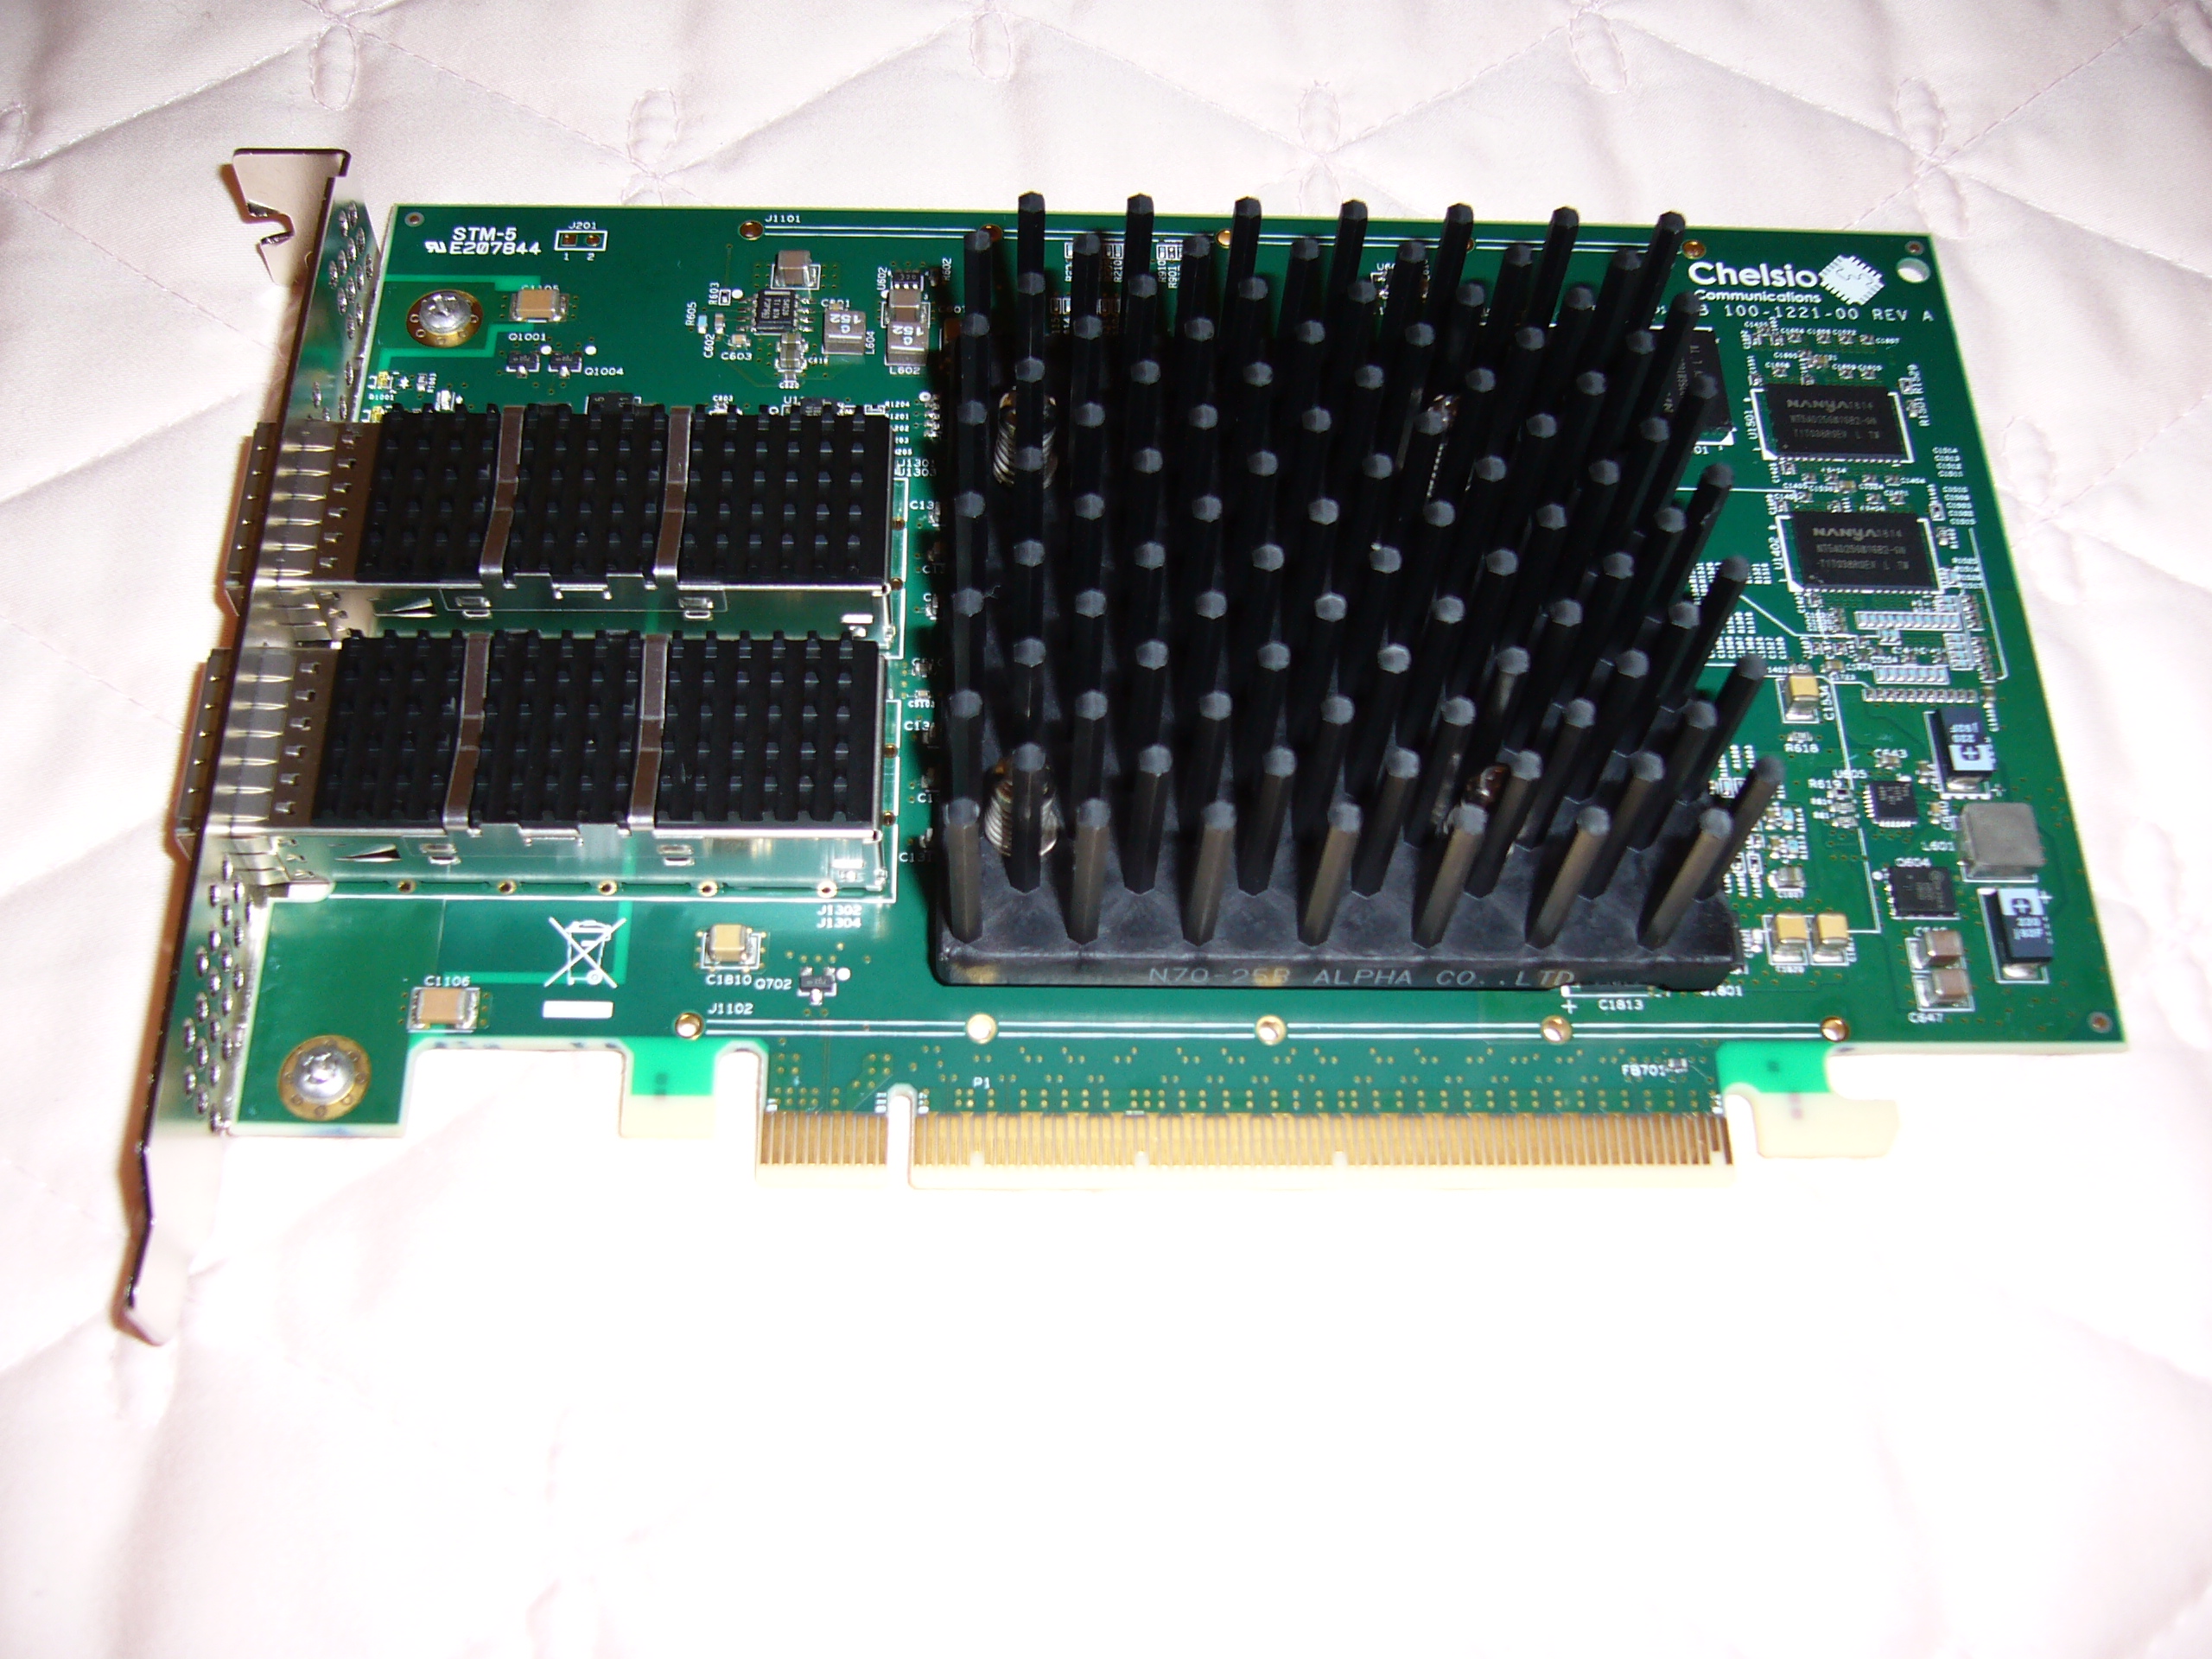 And installed, with a bit of good old Arctic Silver 5 thermal compound.
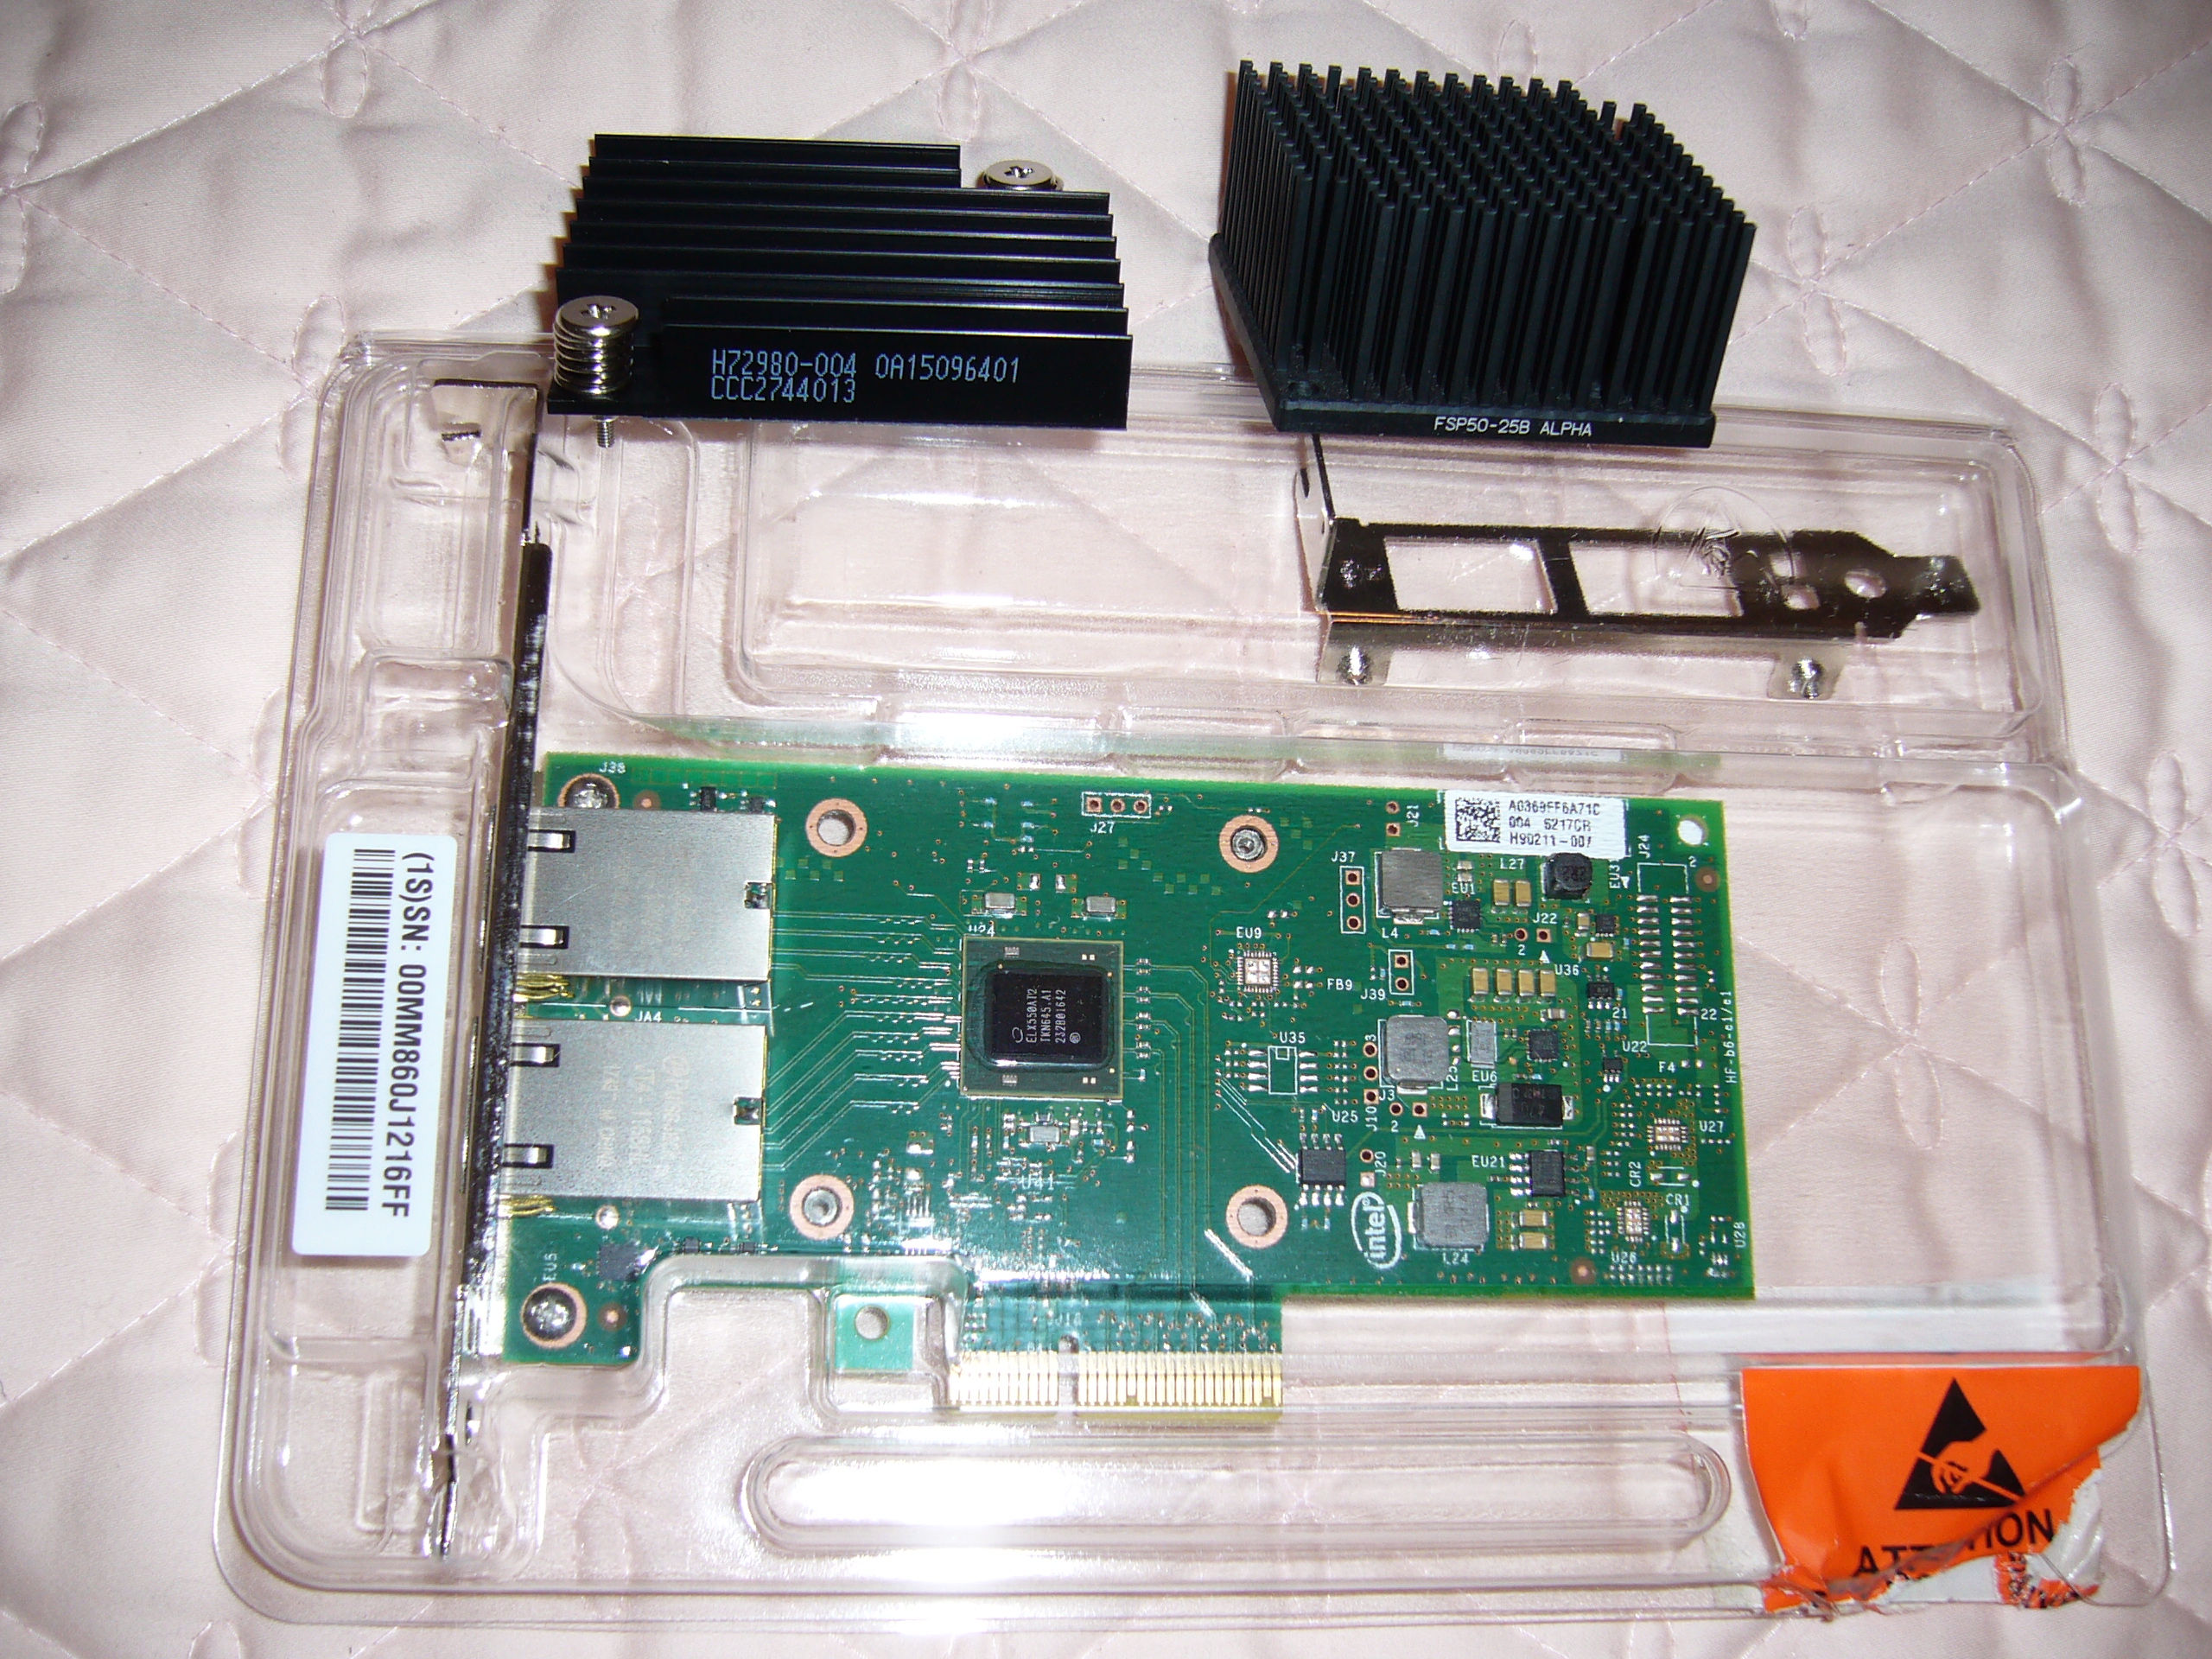 A Lenovo X550-T2 with old and new heat sinks. My choice of the Alpha replacement was pretty straightforward: its mounting hole spacing was correct
and I had two of them from an earlier project. Interestingly, the volume and surface area increases from old to new are about equal (2x). The Alpha
should have ~5000mm3/W with both ports running at 10Gb.
A Lenovo X550-T2 with old and new heat sinks. My choice of the Alpha replacement was pretty straightforward: its mounting hole spacing was correct
and I had two of them from an earlier project. Interestingly, the volume and surface area increases from old to new are about equal (2x). The Alpha
should have ~5000mm3/W with both ports running at 10Gb.
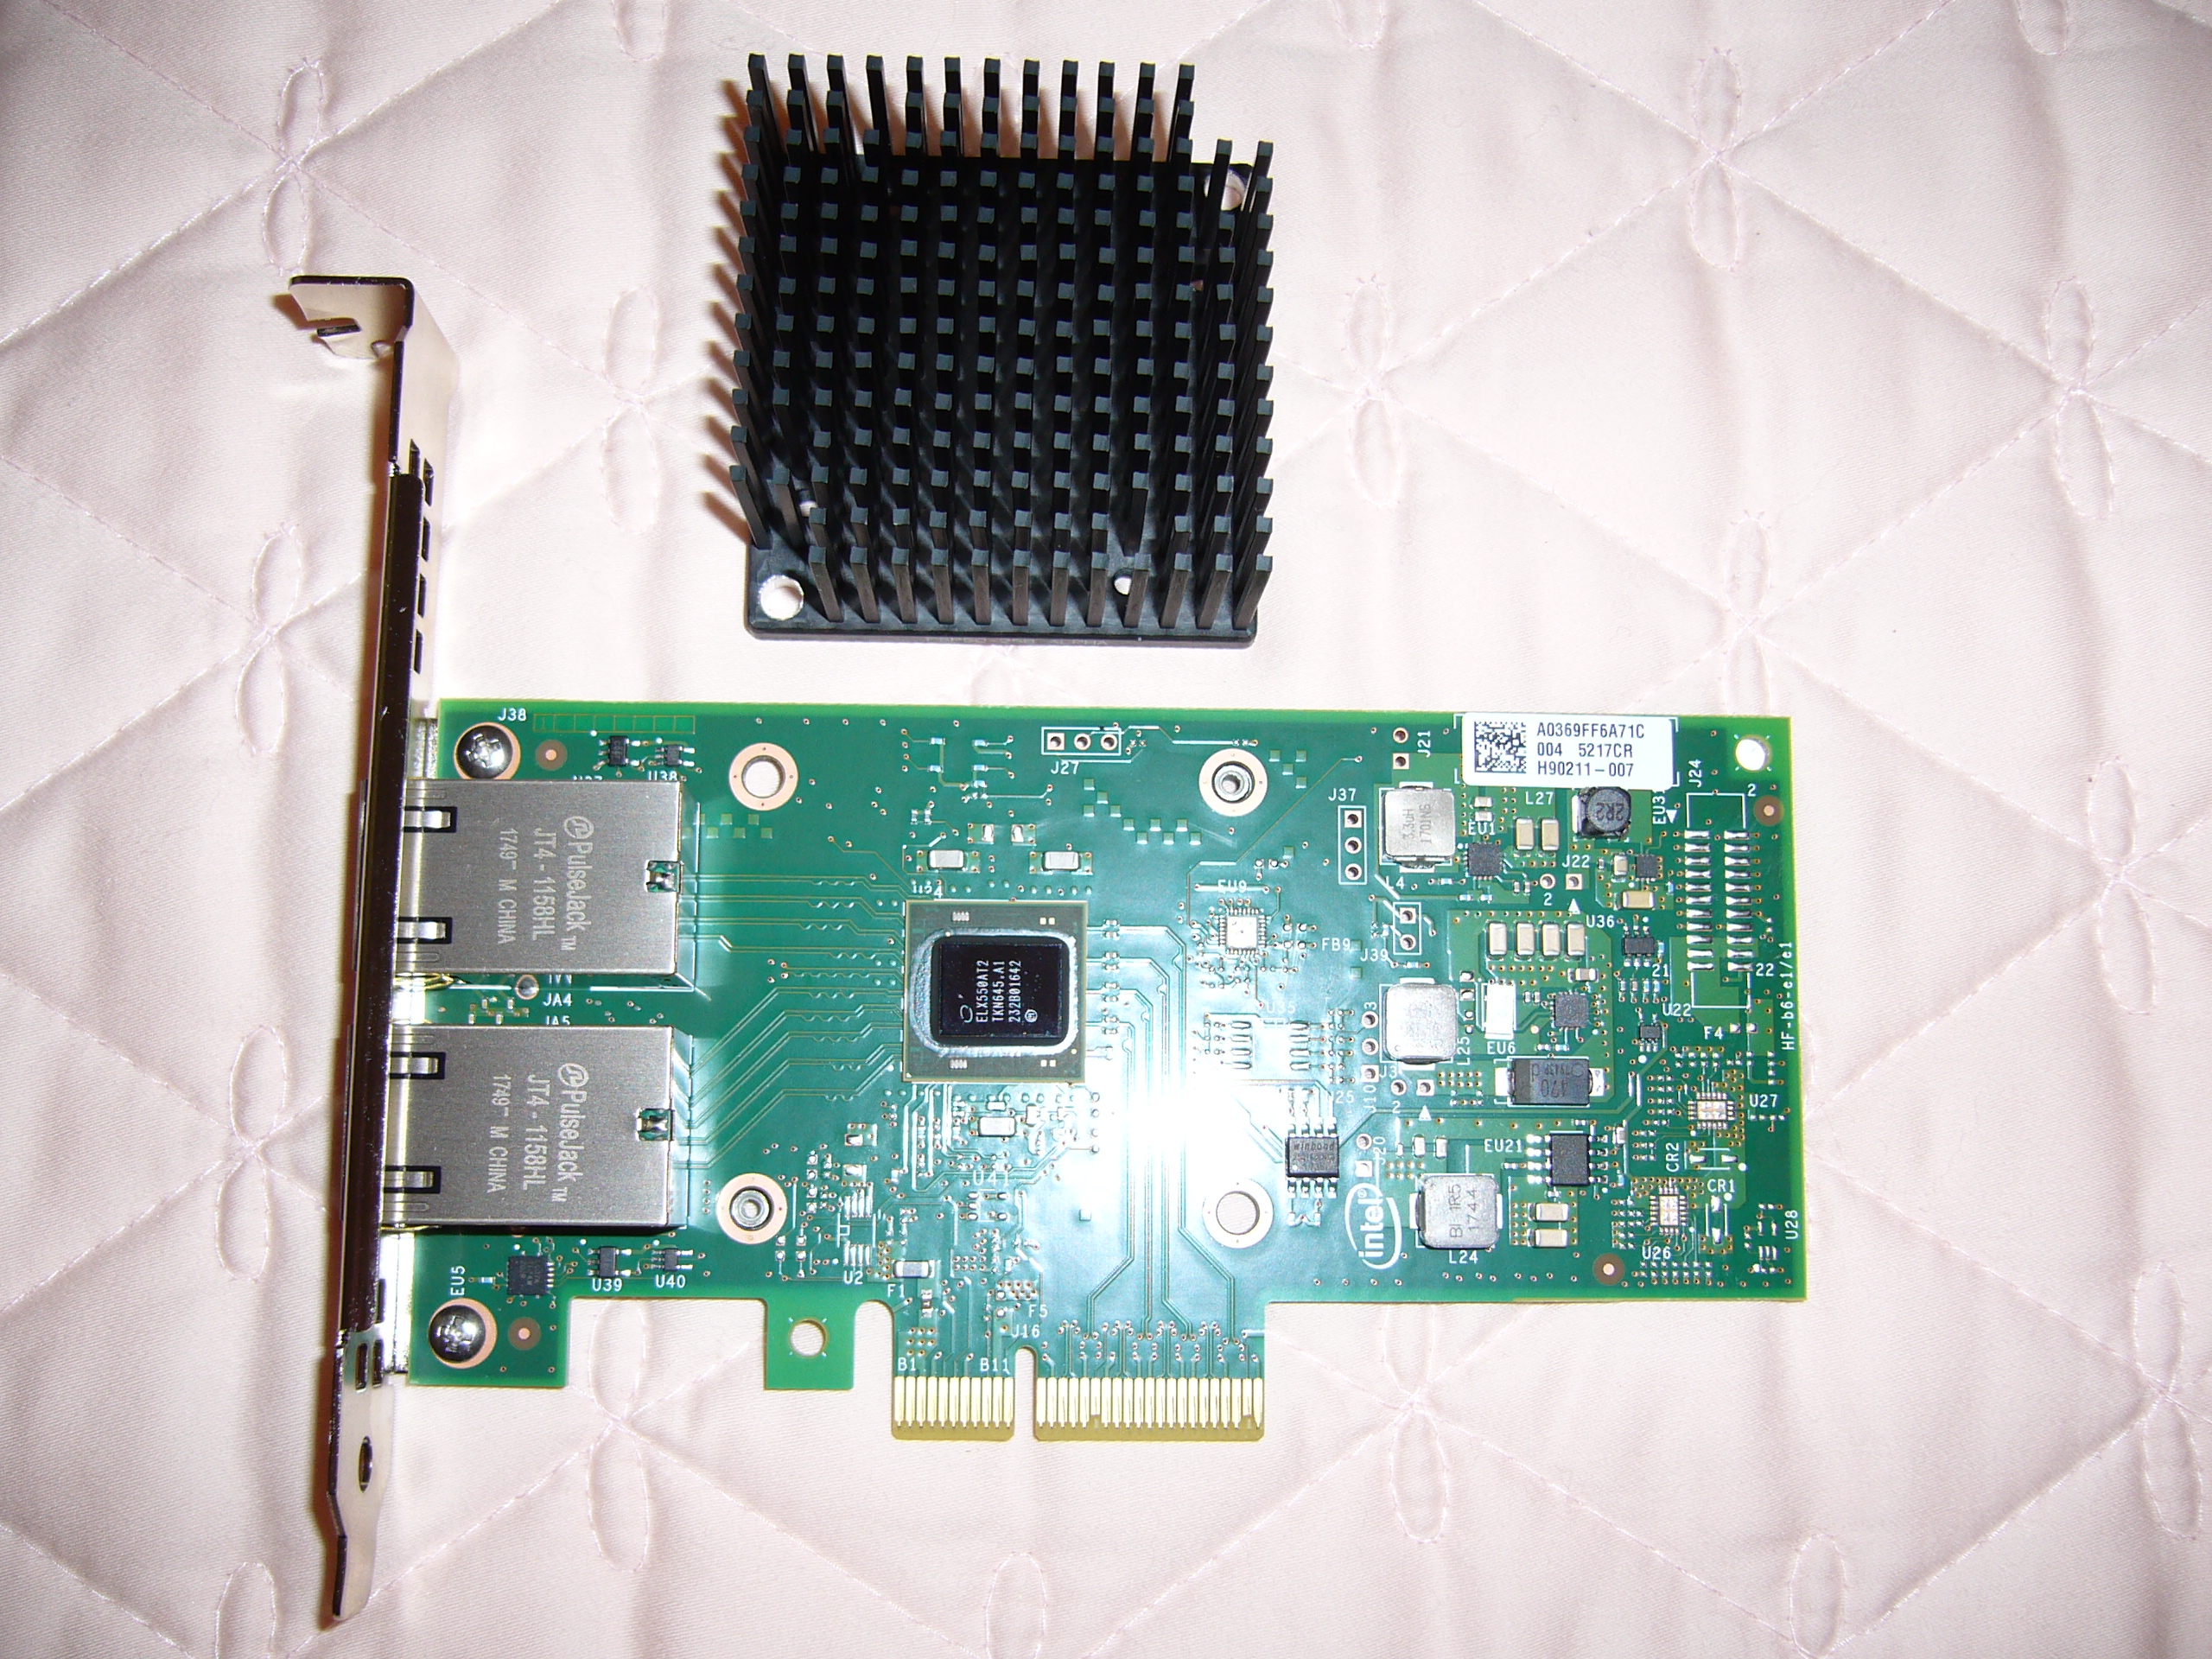 I enlarged the mounting holes (from 3mm to 5/32") to fit the factory shoulder screws...
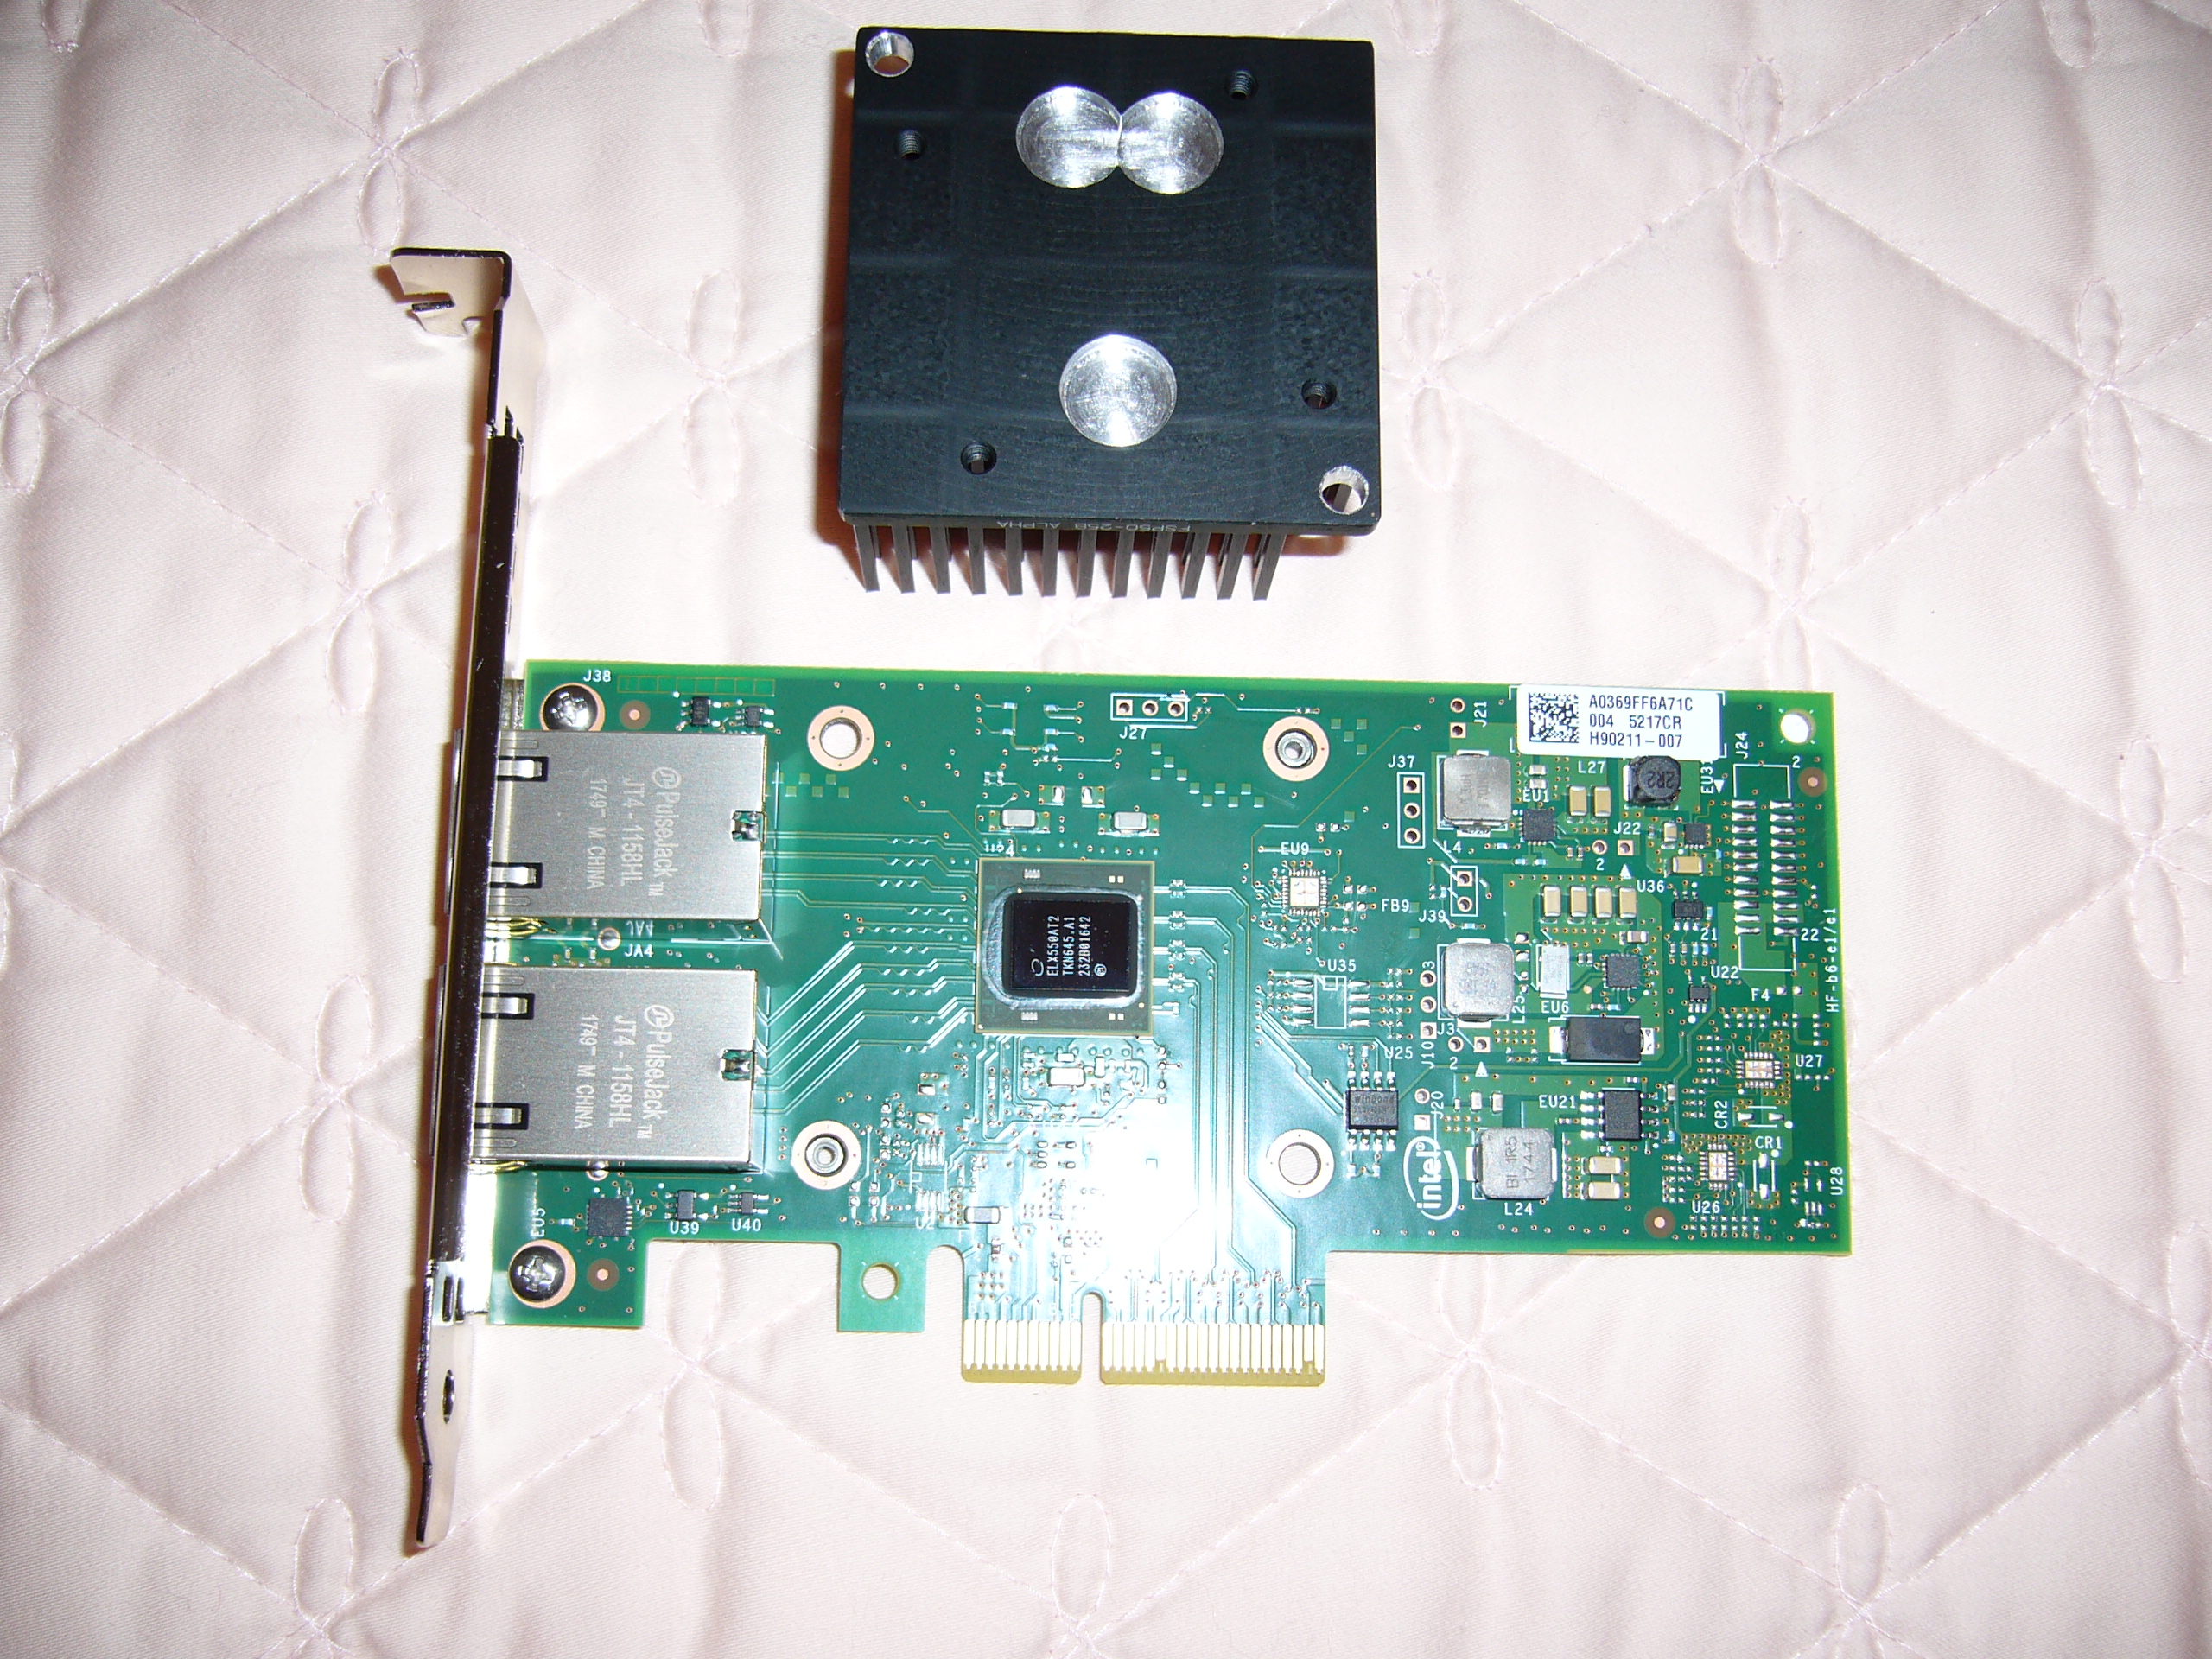 ...and plunge-milled some divots to clear the tall caps. This milling operation went a bit better, likely due to the smaller (3/8") and much nicer
USA carbide end mill.
...and plunge-milled some divots to clear the tall caps. This milling operation went a bit better, likely due to the smaller (3/8") and much nicer
USA carbide end mill.
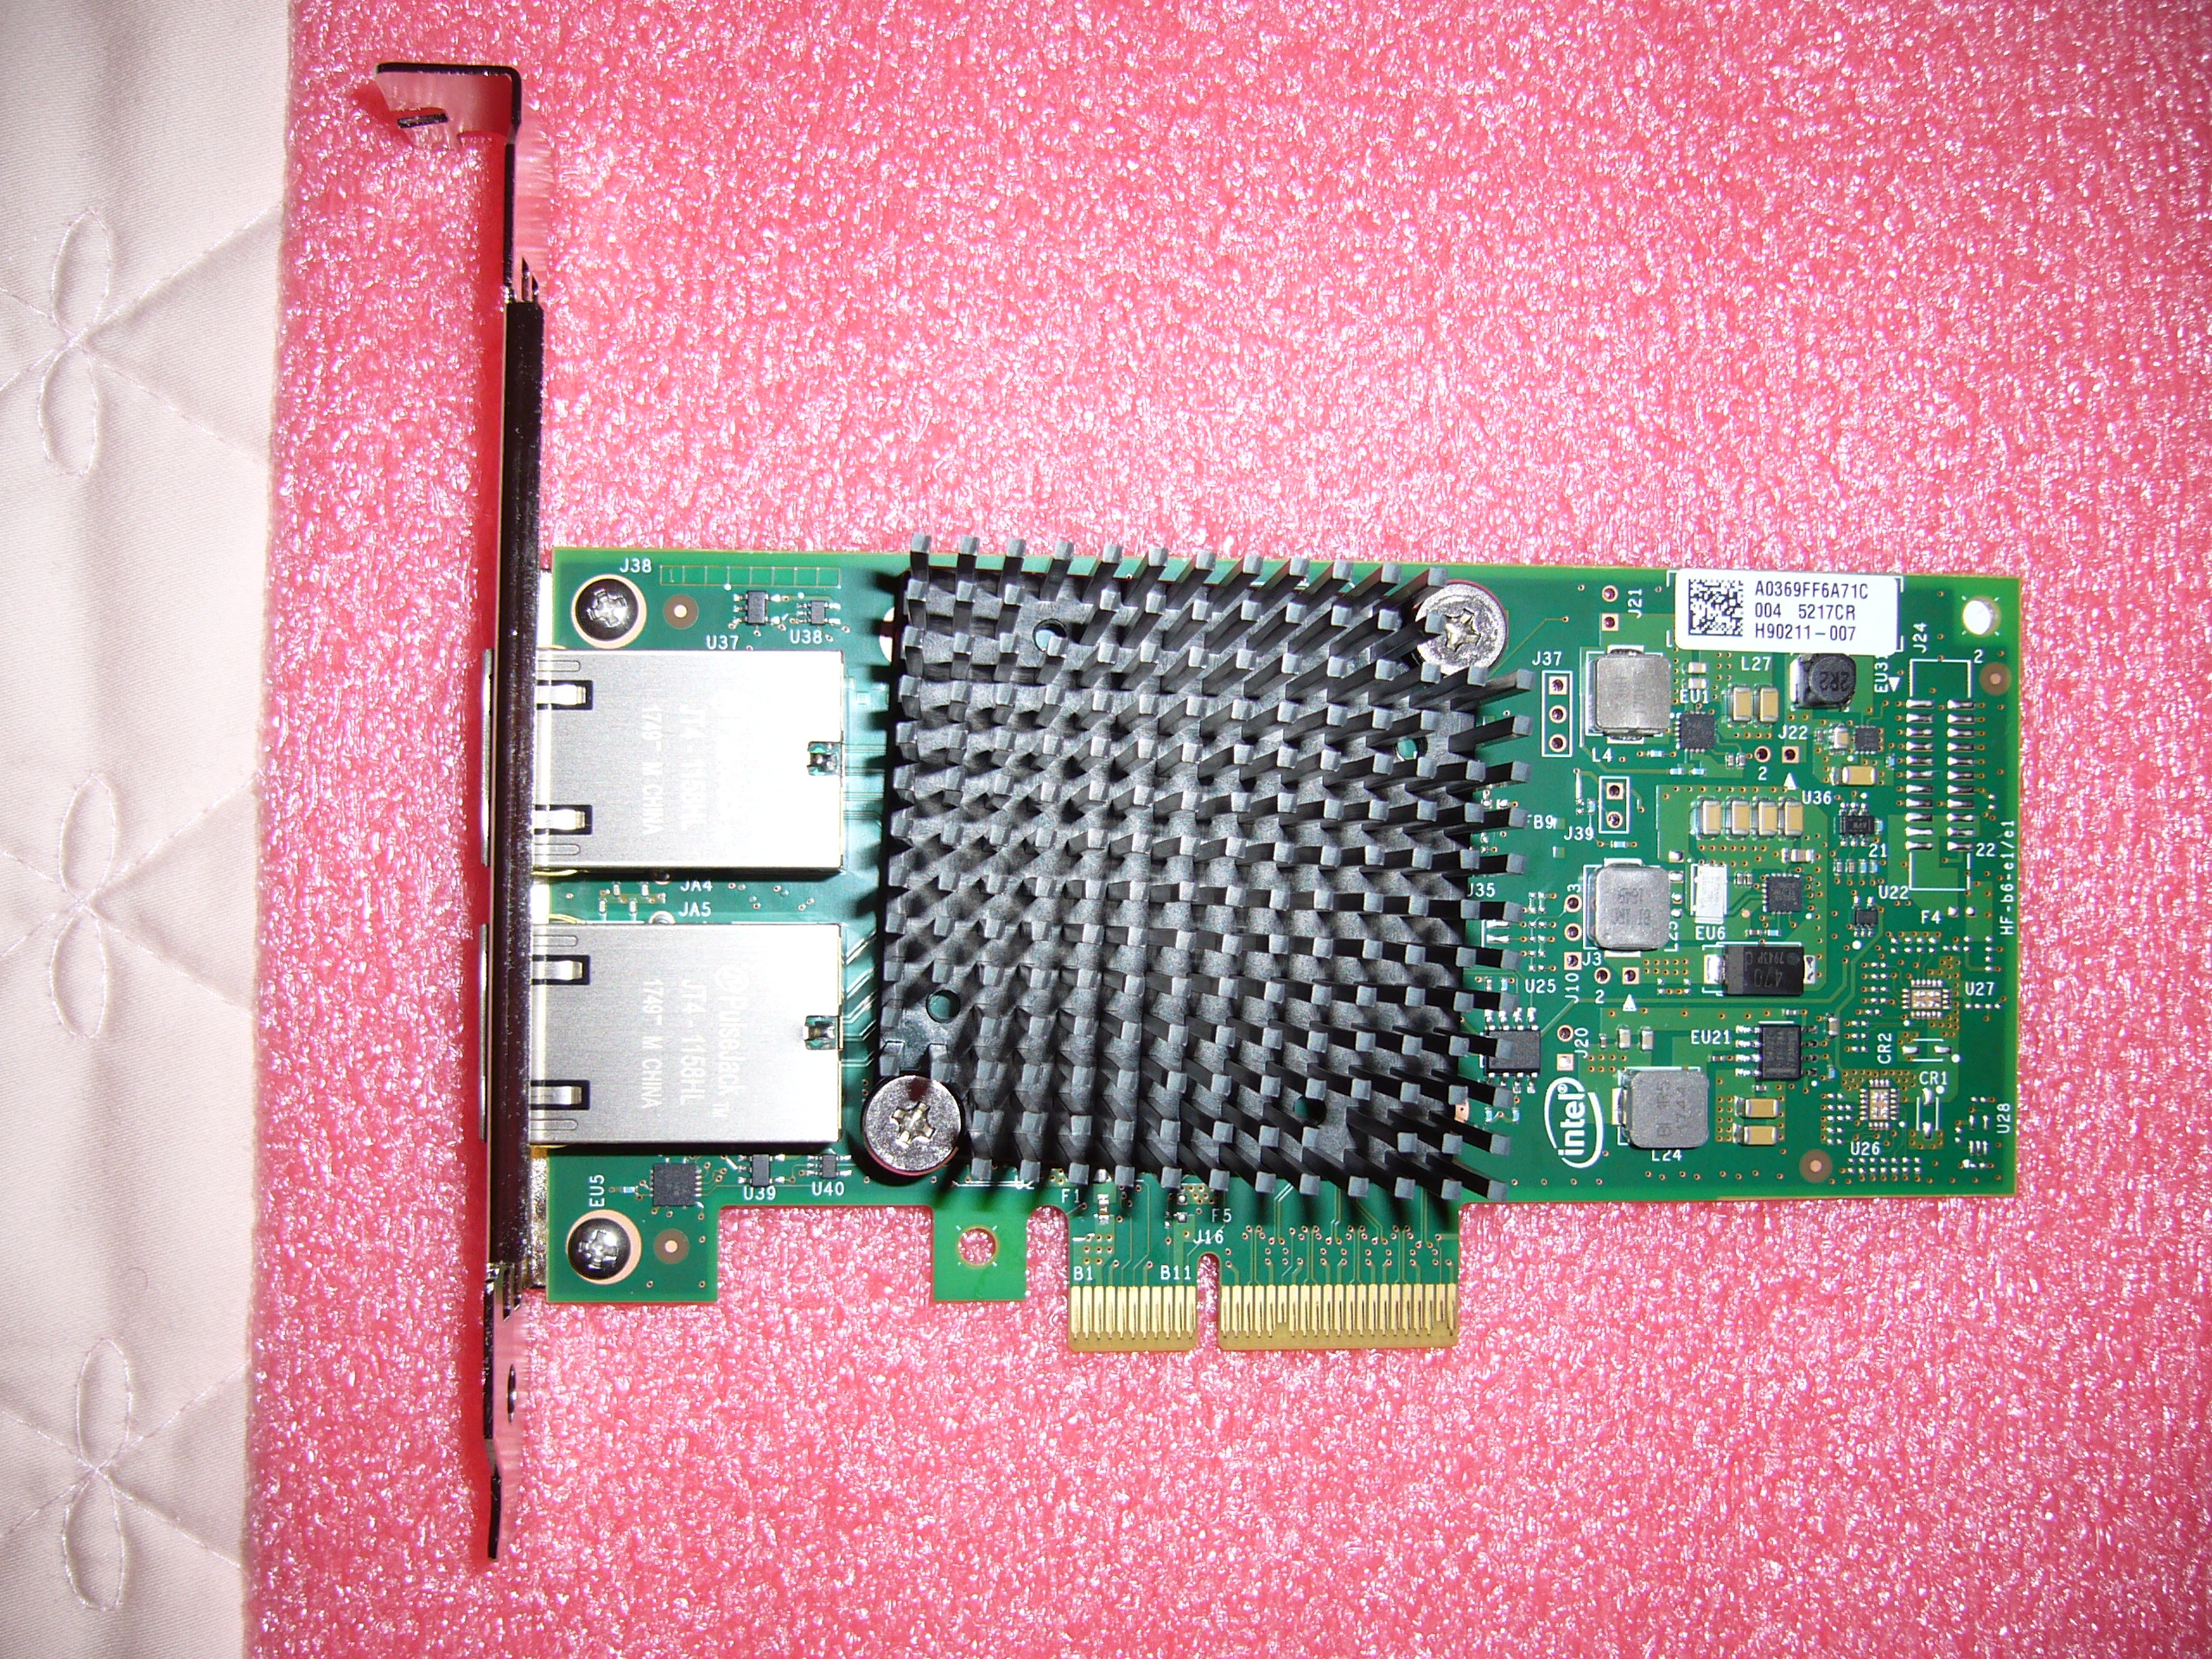 Whoops! I hadn't noticed (or had forgotten) that the old heat sink wasn't square. No big deal - the 3/8" divots still easily clear the 1/8" caps.
I also applied this one with Arctic Silver 5. It performs well, lasts, and is very easy to apply.
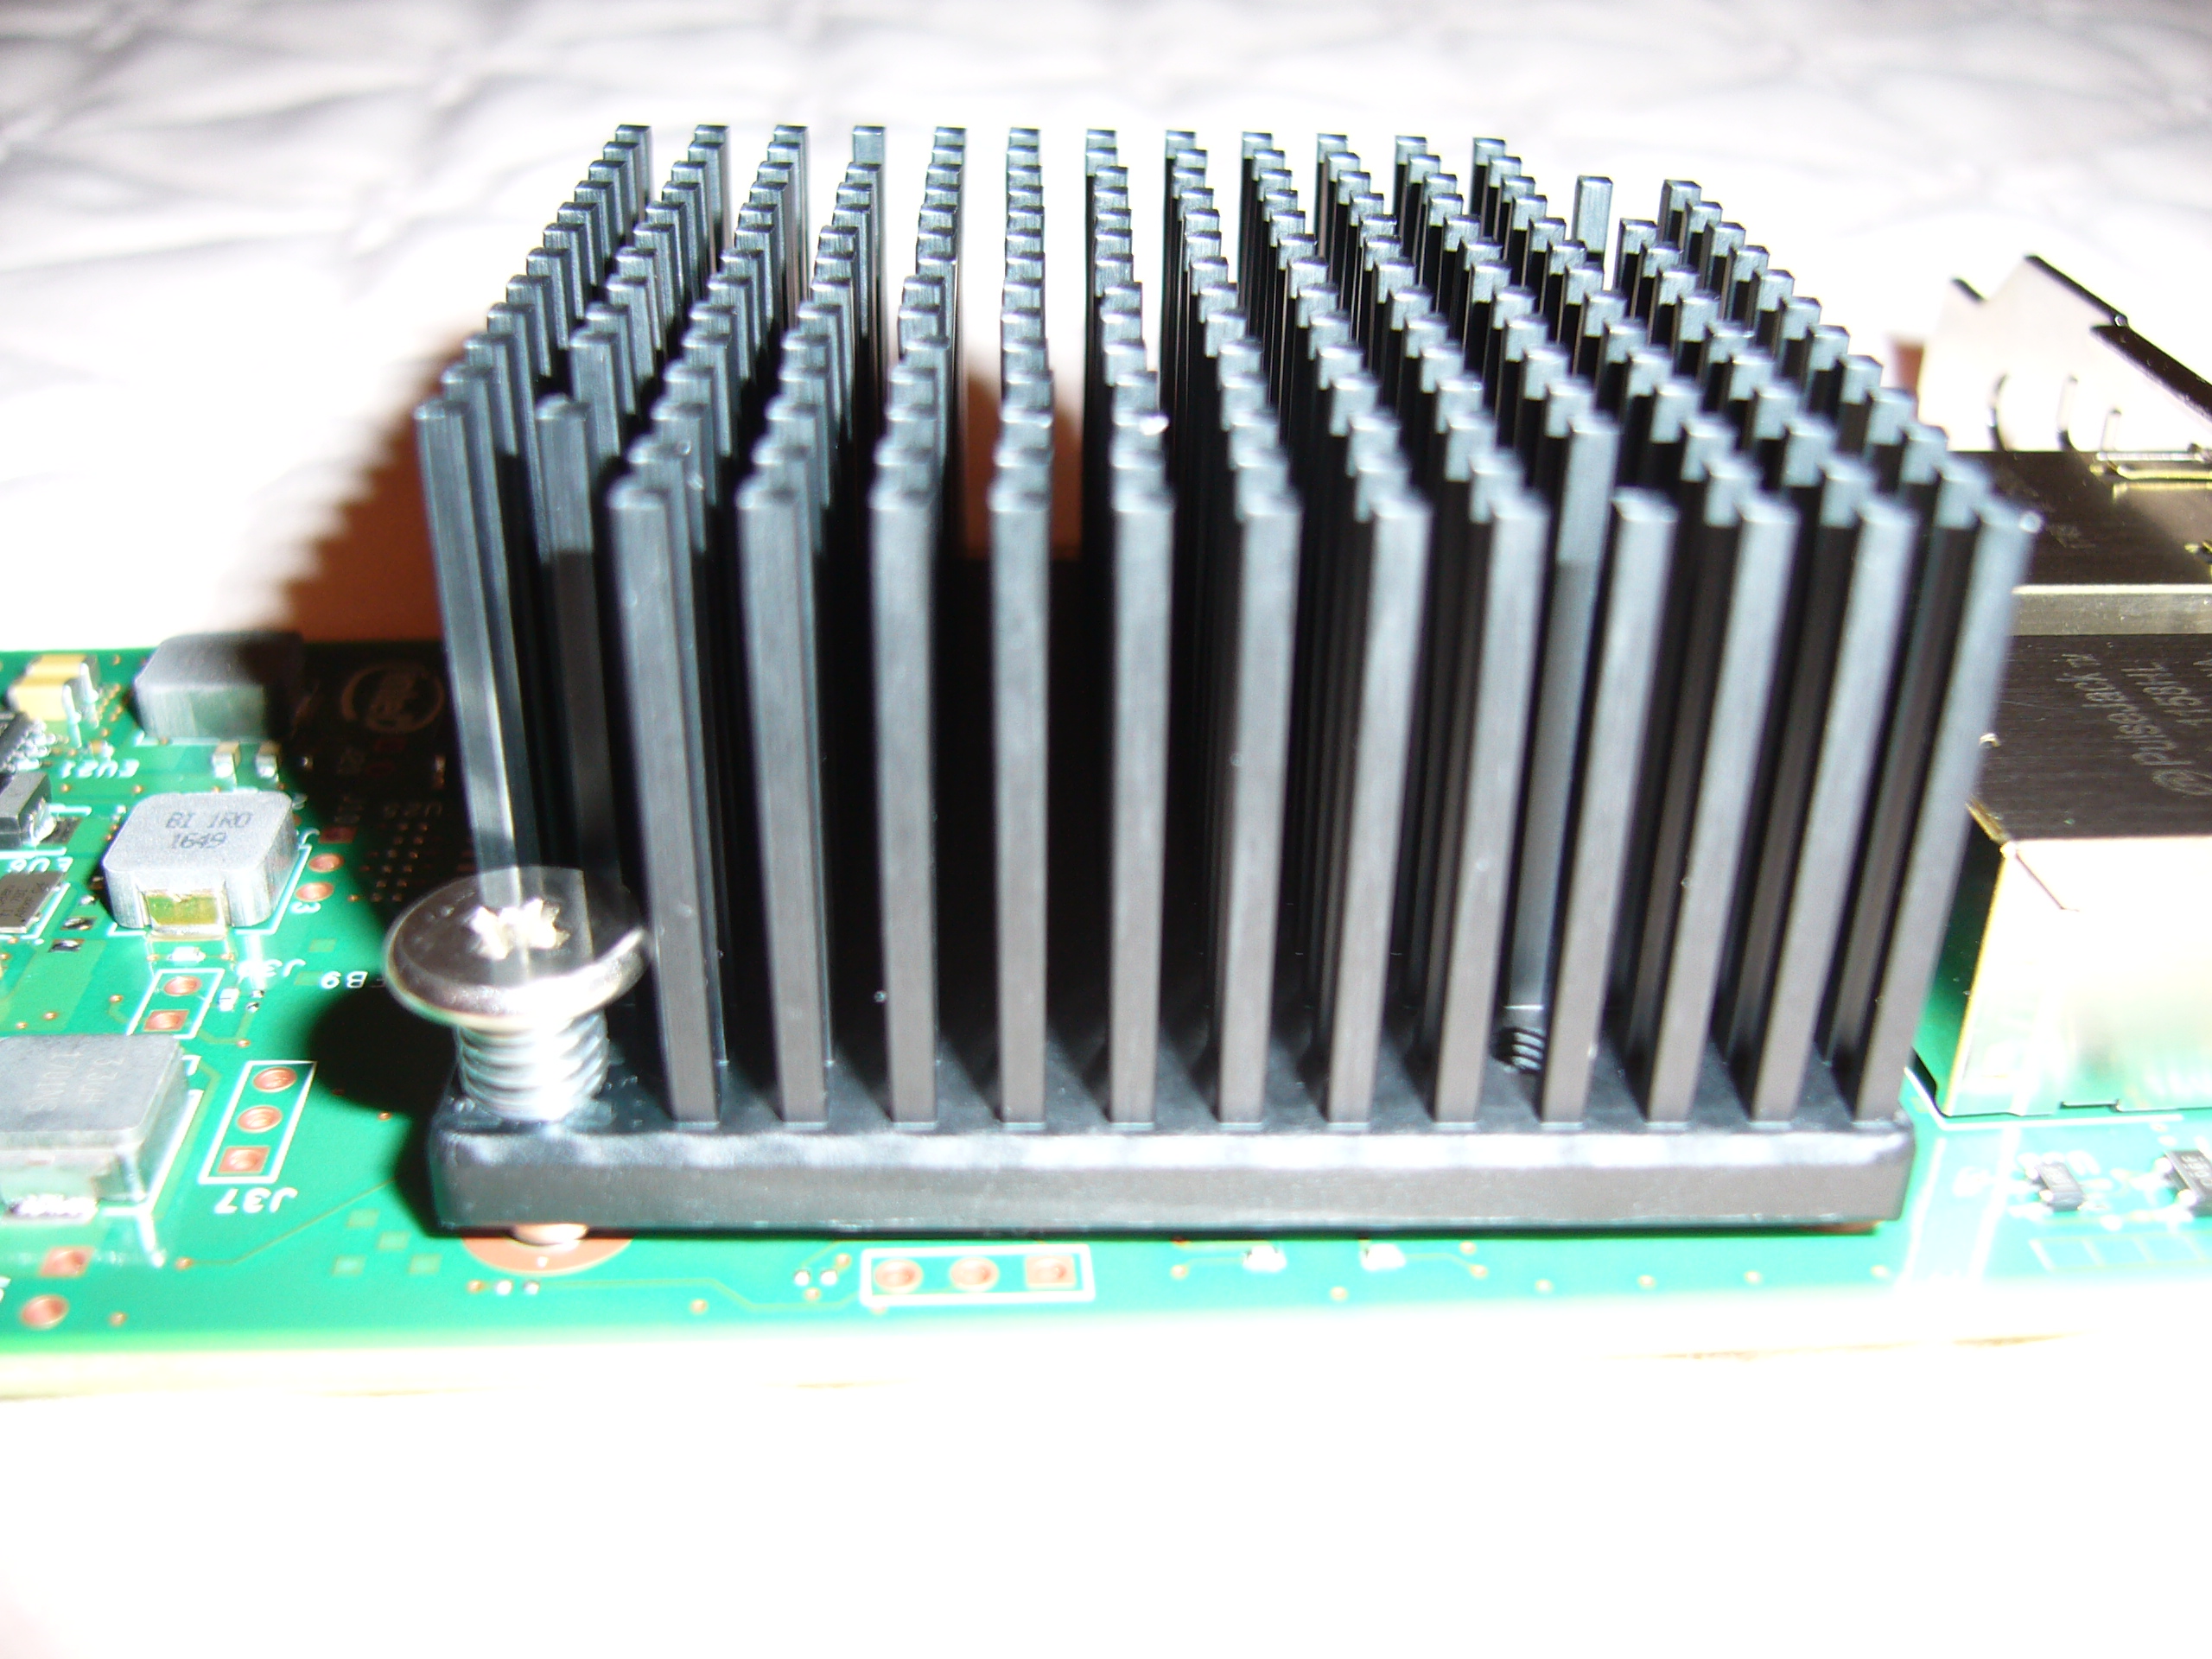 A view of the shoulder screws and springs. Spring choice was based on fit: <4mm compressed height and >3.5mm inner diameter to fit freely over the
shoulder screw shank. I lubed the screws and mounting holes with a bit of Hornady evaporating lube
to prevent binding. The stuff is also good for de-fingerprinting plated metal surfaces (e.g. card brackets and PulseJacks). Good for guns and tools,
too.
A view of the shoulder screws and springs. Spring choice was based on fit: <4mm compressed height and >3.5mm inner diameter to fit freely over the
shoulder screw shank. I lubed the screws and mounting holes with a bit of Hornady evaporating lube
to prevent binding. The stuff is also good for de-fingerprinting plated metal surfaces (e.g. card brackets and PulseJacks). Good for guns and tools,
too.
I originally tried to fit some loose nylon washers on the screws between the heat sink and board to prevent rocking (and cracking the die), but they tended to stand the heat sink off of the die (likely due to card flex). The heat sink seems adequately stable without - the tight fit of the shoulder screws and the near coil bind in the springs limit movement.
Getting this installed was a typical juggling act requiring four hands, in contrast to the stud-mount system I used on the Chelsio.
These two cards (along with an unmodified X710-DA2) are destined for a new firewall, once I modify the enclosure. It may be a while.